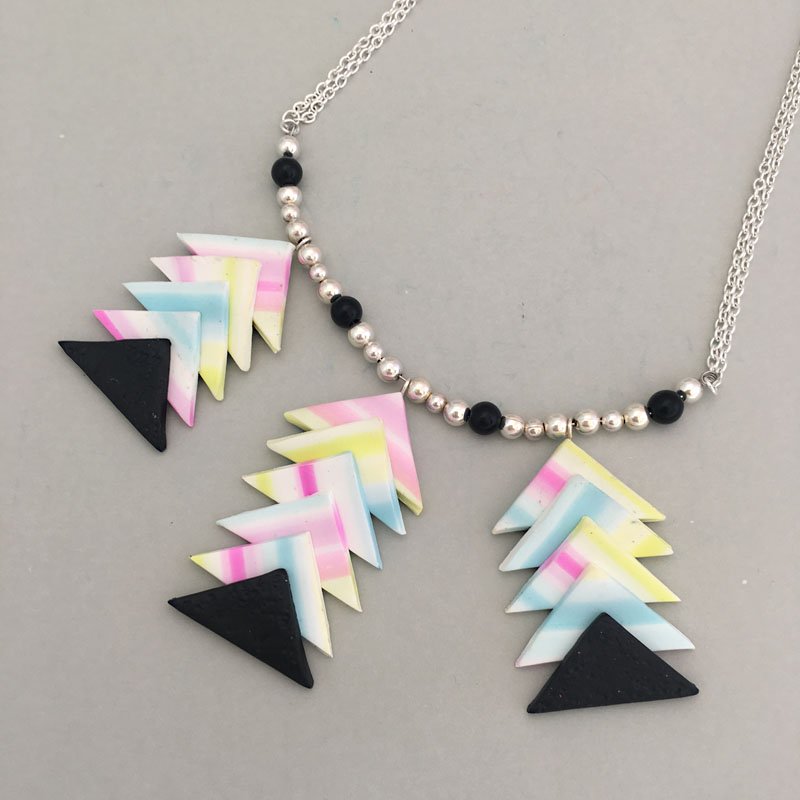
Premo Sculpey Elegant Arrows Necklace
Premo Sculpey Elegant Arrows Necklace
Read More
Create this elegant necklace in an evening..and wear it the next day!
Design by Amy Koranek
Sculpey Mosaic Triangle Cutters Available May 1, 2019
Read Less
ADDITIONAL SUPPLIES
1” Silver tone eye pins (3)

Project Instructions
Getting Started:Do not use unbaked clay on unprotected furniture or finished surfaces. Start with clean hands and work surface area. Good work surfaces include wax paper, metal baking sheet, or disposable foil. Knead clay until soft and smooth. For best results, clean your hands in between colors. Shape clay, pressing pieces together firmly. Bake on oven-proof glass or metal surface at 275 degrees F (130 degrees C) for 15 minutes per ¼” (6mm) thickness. For best baking results, use and oven thermometer. DO NOT USE MICROWAVE OVEN. DO NOT EXCEED THE ABOVE TEMPERATURE OR RECOMMENDED BAKING TIME. Wash hands after use. Baking should be done by an adult.Begin by preheating oven to 275 degrees F (130 degrees C). Test temperature with oven thermometer for perfectly cured clay. For best results, condition all clay by running it through the clay dedicated pasta machine several passes on the widest setting. Fold the clay in half after each pass and insert the fold side into the rollers first.
Sheet 1/2 bar of White through the pasta machine on the thickest setting. Lay little ropes of the other colors on top of the White sheet. Press the ropes down hard with your fingers or with the Acrylic Clay Roller to flatten them. Press the sheet through the pasta machine on the thickest setting to smooth the ropes

Fold the sheet in half across the stripes matching like color to like color with the stripes on the outside. Press the sheet through the pasta machine on the thickest setting fold first. Repeat folding the sheet (with the crease going across the stripes) and pressing it through the pasta machine until the stripes become blended and blurry.

Cut out several triangles using the Large Triangle Cutter. You will need at least 16 if you want to make the necklace as shown.

With jewelry pliers, bend an eye pin in half as shown. The eye pins will be embedded in the clay and the bend will keep them from being pulled out once the clay is cured.I am going to string the finished wire directly through the eye pins, so I am bending them so that the eye sits perpendicular to the clay triangles

Thin three of the triangles by pressing them through the pasta machine on the third thickest setting. Re-cut them so they have the right triangle shape again.Place an eye pin on each of these thinned triangles so that the bent corner is laying flat on the clay and the eye is perpendicular to the clay at the top. These will be the back triangle pieces and we don’t want them to be too thick.

Sheet Black through the pasta machine on the thickest setting. Texture the Black using course sandpaper or a random small texture sheet. We don’t want the texture to be too big or overpowering. Cut out three triangles.

Next it’s time to layer the pieces. Start at the back with the piece that has an eye pin on it. Layer another thicker triangle directly on top of the eye pin sandwiching it into place. Then place more striped triangles stepping them down at least 3/16”. Select triangles that have stripes moving in different directions each time one is layered on top of the other.For the center piece, layer five striped triangles. For the side pieces, layer four striped triangles.Finally, place a Black triangle at the bottom. Bake the pieces following the baking instructions

When the pieces are completely cool, string them onto the short bead wire with the black and metal beads as shown. Trim the wire to 3/4” on each end of the beaded piece. Use round nose jewelry pliers to coil closed loops at each end of the wire. Attach chain with jump rings to the loops.


