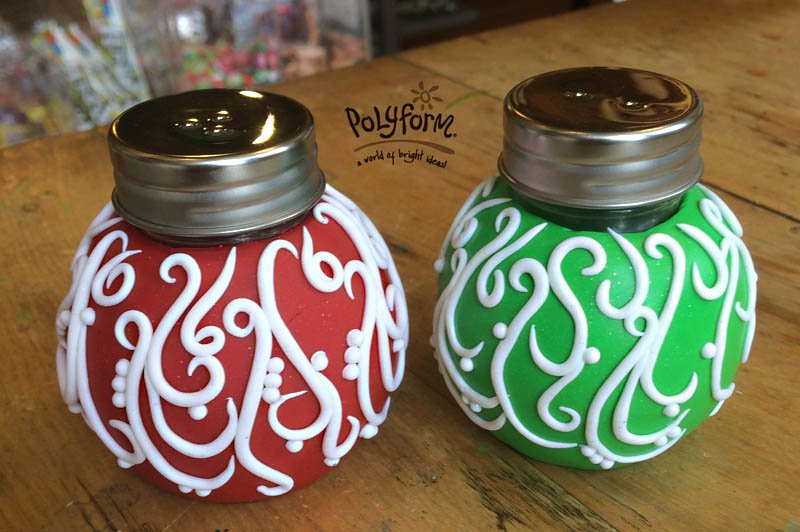
premo! Sculpey Christmas Ornament Salt & Pepper Shakers
premo! Sculpey Christmas Ornament Salt & Pepper Shakers
Read More
These cute little salt and pepper shakers will be a cheerful addition to your holiday tables or make them as a hostess gift!
Design by Amy Koranek
Read Less
ADDITIONAL SUPPLIES
Awl, Hammer, Round glass jars with screw tight lids

Project Instructions
Getting Started:
Polymer clay may stain. CLAY MAY DAMAGE UNPROTECTED FURNITURE OR FINISHED SURFACES. DO NOT USE polymer clay on unprotected surfaces. We recommend working on the Sculpey® Work ‘n Bake Clay Mat, wax paper, metal baking sheet, or disposable foil. Start with clean hands and work surface area. Knead clay until soft and smooth. For best results, clean your hands in between colors. Shape clay, pressing pieces together firmly. Bake on oven-proof glass or metal surface at 275°F (130 °C) for 30 minutes per ¼" (6 mm) thickness. For best baking results, use an oven thermometer. DO NOT USE MICROWAVE OVEN. DO NOT EXCEED THE ABOVE TEMPERATURE OR RECOMMENDED BAKING TIME. Wash hands after use.
Polymer clay may stain. CLAY MAY DAMAGE UNPROTECTED FURNITURE OR FINISHED SURFACES. DO NOT USE polymer clay on unprotected surfaces. We recommend working on the Sculpey® Work ‘n Bake Clay Mat, wax paper, metal baking sheet, or disposable foil. Start with clean hands and work surface area. Knead clay until soft and smooth. For best results, clean your hands in between colors. Shape clay, pressing pieces together firmly. Bake on oven-proof glass or metal surface at 275°F (130 °C) for 30 minutes per ¼" (6 mm) thickness. For best baking results, use an oven thermometer. DO NOT USE MICROWAVE OVEN. DO NOT EXCEED THE ABOVE TEMPERATURE OR RECOMMENDED BAKING TIME. Wash hands after use.
Baking should be completed by an adult. Begin by preheating oven to 275 °F (130 °C). Test temperature with oven thermometer for perfectly cured clay. For best results, condition all clay by running it through the Clay Conditioning Machine for several passes on the widest setting. Fold the clay in half after each pass and insert the fold side into the rollers first.
You can transform any jars with screw tight lids into salt and pepper shakers by punching holes in them with a hammer and awl. I chose round jars so they would look like Christmas ornament balls.

Sheet Red Glitter through the clay conditioning machine on the thickest setting. Make sheet that is long enough to wrap around one of the jars and wide enough to cover it top to bottom. Cut a straight edge along one of the short ends. Wrap the clay all the way around the jar and trim the end to form a neat seam. Smooth the seam with your fingers.

Gently form the clay to the shape of the jar working toward the bottom.

Bend the clay around the bottom edge of the jar.

Use a circle cutter to trim the edge of the clay so that it looks neat on the bottom. Remove excess clay and smooth the edge with your fingers.

Gently form the clay to the shape of the jar working toward the top.

Trim away excess clay.

Roll Frost White Glitter into very skinny strings.

Taper the ends of the white pieces and form curliques. Start by adding the decorations in a N, S, E, W pattern.

Add more and more curliques as you like all around the shaker. Lightly press the decorations on so that they attach to the red clay but don’t smash them.

Add tiny pearls of white with the small Etch ’n Pearl tool. Repeat the process on the second jar with green background clay instead of red to make a set of shakers.

Bake the shakers at 275 for 30 minutes. Fill with salt & pepper when they are completely cool


