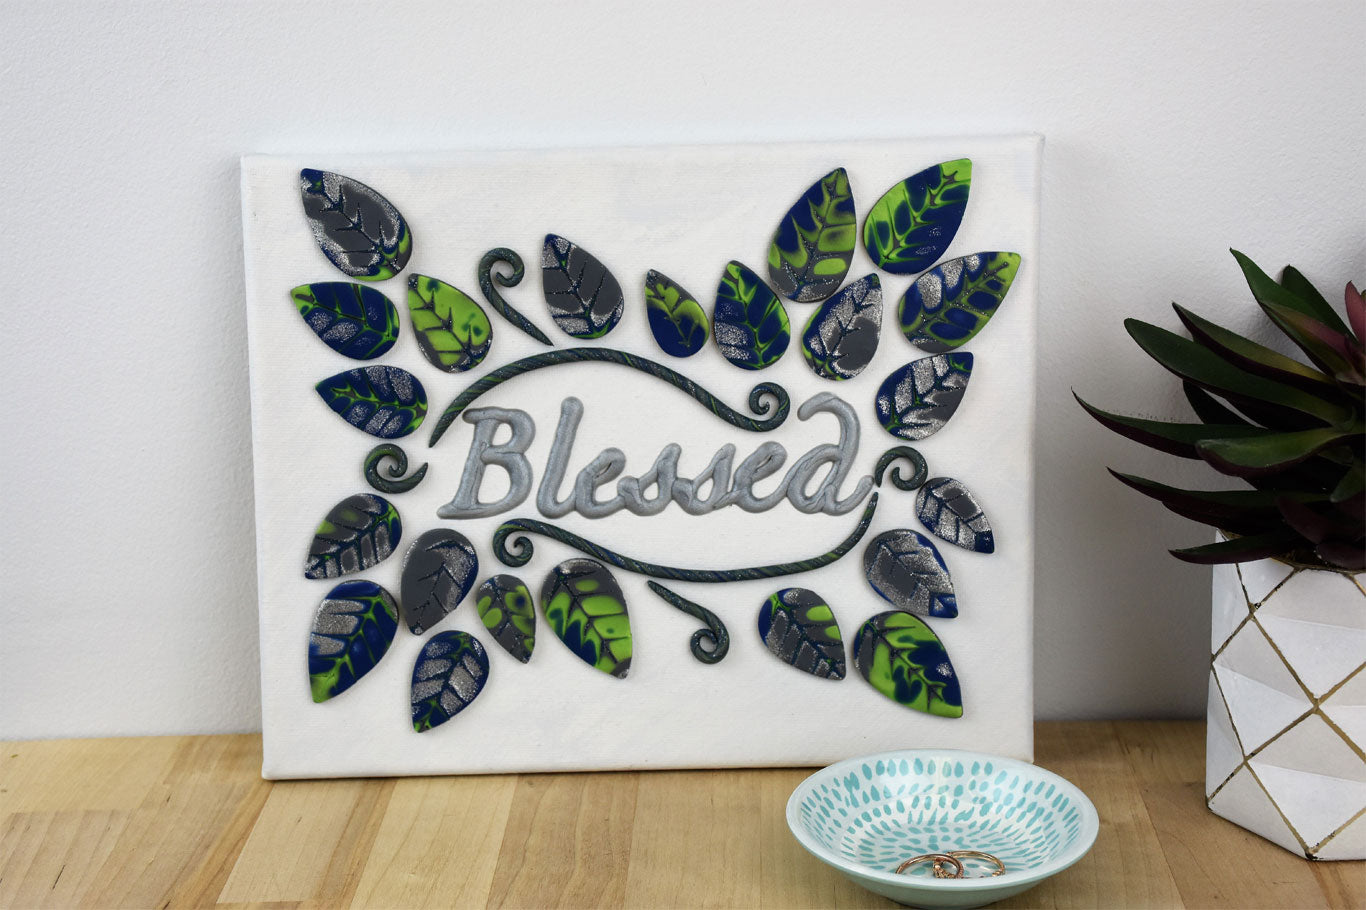
Premo Sculpey® “Blessed” Canvas Wall Hanging
Premo Sculpey® “Blessed” Canvas Wall Hanging
Read More
Read Less
Make a Mokume Gane slab with leaf patterns in it to create a family of leaves that are each unique yet perfectly coordinated.
ADDITIONAL SUPPLIES
Smooth glass for tracing message“Blessed” or other message printed on copy paper
8” x 10” stretched canvas
Barrier paper like deli wrap or kitchen stretch wrap or wax paper
Acrylic paint in coordinating colors - I painted the background of mine a very light light light light gray which I mixed from white and silver acrylic paint
Paintbrush
White craft glue

Project Instructions
Getting Started:
Do not use unbaked clay on unprotected furniture or finished surfaces. Start with clean hands and work surface area. Good work surfaces include wax paper, metal baking sheet, or disposable foil. Knead clay until soft and smooth. For best results, clean your hands in between colors. Shape clay, pressing pieces together firmly. Bake on oven-proof glass or metal surface at 275 degrees F (130 degrees C) for 15 minutes per ¼” (6mm) thickness. For best baking results, use and oven thermometer. DO NOT USE MICROWAVE OVEN. DO NOT EXCEED THE ABOVE TEMPERATURE OR RECOMMENDED BAKING TIME. Wash hands after use. Baking should be done by an adult.
Begin by preheating oven to 275 degrees F (130 degrees C). Test temperature with oven thermometer for perfectly cured clay. For best results, condition all clay by running it through the clay dedicated pasta machine several passes on the widest setting. Fold the clay in half after each pass and insert the fold side into the rollers first.
Sheet each clay color through the pasta machine on the thickest setting. For this project you will need a 3” x 3” square of each color.

Layer the Bright Green Pearl over the Navy and the White Gold Glitter over the Slate. Sheet the two separate stacks through the pasta machine on the thickest setting.

Layer one of the double color sheets on top of the other.

Sheet all four layers together through the pasta machine on the thickest setting. Cut the sheet into four equal pieces.

Layer the four sections on top of each other.

Roll over the stack to make sure all the air bubbles are pressed out. Use the knife tool from the Clay Tool Starter Set to make deep lines from each corner almost to the center of the square. These will be the major veins of the leaves. Press the sides inward with the palms of your hands to seal the cuts back together.

Use the tip of the knife tool to make smaller veins along side the major veins. Make all the details deep so that the design goes as far into the slab as possible.

Press the sides of the slab back together with the palms of your hands.

Roll over the top of the slab with the acrylic roller to make sure it is level. Carefully slice parallel with the color stripes in the slab to remove a very thin layer of clay. When you flip the thin slice over, a leaf pattern will be revealed.

Sheet additional Slate clay through the pasta machine on the third thickest setting. Lay the sliced leaf pattern on top of the Slate sheet. Roll over the leaf pattern with the acrylic roller to seal it to the layer below.

Cut through the leaf shape and the base layer of clay with the teardrop shapes. I used three different sizes of the cutters for my leaves.

Keep slicing through the slab to make more leaf patterns. Place each leaf pattern onto the base clay and then cut them out with teardrop shapes. If you slice very thinly and carefully, you should be able to get twenty leaf patterns from the slab.Bake the leaves following the baking instructions.

Keep slicing through the slab to make more leaf patterns. Place each leaf pattern onto the base clay and then cut them out with teardrop shapes. If you slice very thinly and carefully, you should be able to get twenty leaf patterns from the slab.Bake the leaves following the baking instructions.

Roll scraps of the remaining colors into a long twisted rope.

Roll and twist the rope very thinly so that you can use it to make swirled designs around your message. When the message from Step 14 is completely cool, gently peel it from the glass.Arrange the message, and the leaves on the canvas. Use the thin twisted rope to fill in between the message and the leaves as needed to tie it all together. For this step I used a barrier paper (as listed above) so that unbaked clay will not stain the canvas background.Bake the swirls following the baking instructions.

If desired, paint the background of your canvas with acrylic paint. Allow the paint to dry completely.Glue all the baked pieces onto the canvas with white craft glue. Allow to dry completely before installing.


