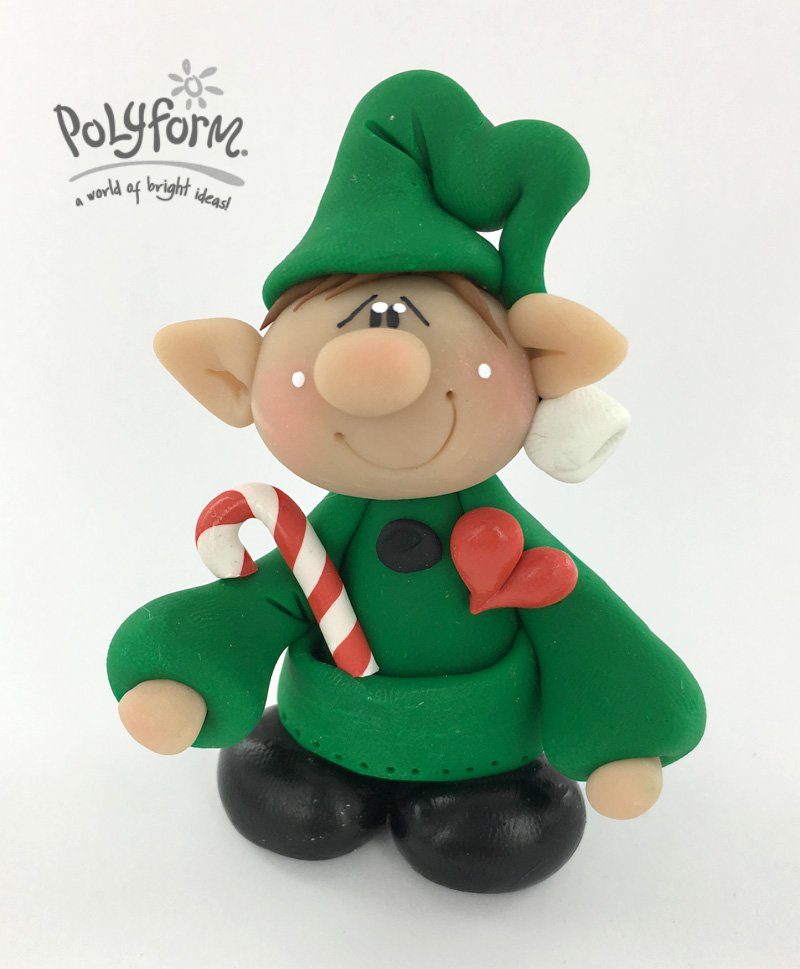
Premo! Christmas Elf with Candy Cane in his Front Pocket
Premo! Christmas Elf with Candy Cane in his Front Pocket
Read More
This jolly little elf will brighten your table, a gift, even decorate your tree if you add a hanger!
Design by Helen Terlalis Dorn
Read Less
ADDITIONAL SUPPLIES
Needle Tool or Round Toothpick, Craft Knife, Acrylic Paint – White, Chalk – pink for cheeks, Permanent Marker – black, Gloss – Satin or Matte,

Project Instructions
Getting StartedPolymer clay may stain. CLAY MAY DAMAGE UNPROTECTED FURNITURE OR FINISHED SURFACES. DO NOT USE polymer clay on unprotected surfaces. We recommend working on the Sculpey clay mat, wax paper, metal baking sheet, or disposable foil. Start with clean hands and work surface area. Knead clay until soft and smooth. For best results, clean your hands in between colors. Shape clay, pressing pieces together firmly. Bake on oven-proof glass or metal surface at 275°F (130 °C) for 30 minutes per ¼" (6 mm) thickness. For best baking results, use an oven thermometer. DO NOT USE MICROWAVE OVEN. DO NOT EXCEED THE ABOVE TEMPERATURE OR RECOMMENDED BAKING TIME. Wash hands after use. Baking should be completed by an adult.Begin by preheating oven to 275 °F (130 °C). Test temperature with oven thermometer for perfectly cured clay. For best results, condition all clay by running it through the Clay Conditioning Machine for several passes on the widest setting. Fold the clay in half after each pass and insert the fold side into the rollers first.
Make two big shoes using two balls of .75” black clay. Push the heel in a little to make an indention where the torso will sit. Set on work surface.

Make a teardrop shape using a 1” ball of green and place it on the shoes

Flatten a piece of green clay and place across his tummy for a large pocket and make ‘stitch’ marks using a toothpick


Next make two sleeves using .75” balls of green clay – make a hole at the end of each sleeve and attach a small teardrop shape as hands.

Attach the arms to the shoulder area. Make sleeve crease marks with a toothpick. At this point, add a tiny ball of black to make a button and place as shown. Insert a half a toothpick into the neck area (for added head stability).

Make a ball using a 1” ball of Super Sculpey (use your judgment here for the size head you prefer) and insert over the toothpick. Make two triangles using a small amount of Super Sculpey and press on the sides of the head (to create the ears), make indent lines.

Add a nose and make a mouth using a needle tool or toothpick for an open mouth. For hair, roll tiny pieces of brown clay into thin strands and lay on top of head. Brush a little pink chalk on the blush areas of the cheek and nose.

For cap, roll out a 1” ball of green into a long, long teardrop and twist and shape. Add a small ball of white to the end as a pompom.

Candy Cane: Roll out snakes of clay, one in white and one in red and place side by side and twist to resemble candy cane stripes. Make a heart using two teardrop shapes of red and attach to his chest


BAKE AS DIRECTED ABOVE: When cooled draw one eyes and eyebrows and add white dots of paint for cheek highlight.


