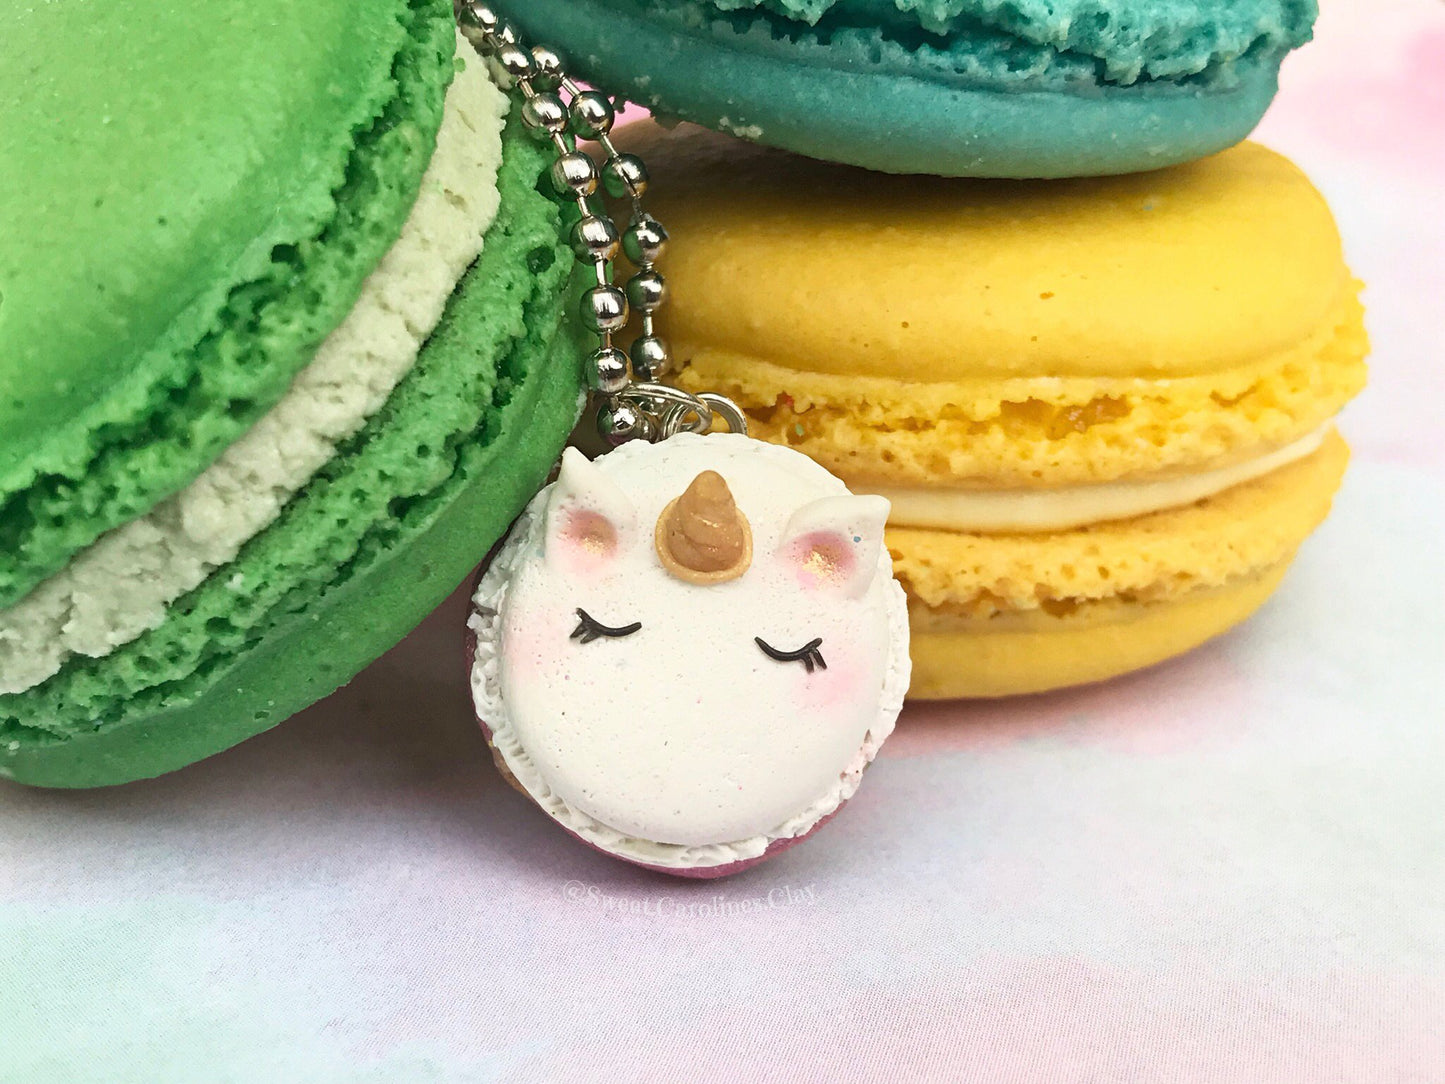
Kawaii Unicorn Macaron
Kawaii Unicorn Macaron
Designed by: Caroline from Sweet Caroline’s Clay
Read More
Read Less
This cute Kawaii Macaron is the perfect charm to add to your collection!
ADDITIONAL SUPPLIES
- Dotting Tools
- Q-tips and Alcohol
- Circular Cutter
- Pink Pigment or Blush
- Toothbrush
- Head Pin
- Needle Nose Pliers

Project Instructions
Getting Started:Please make sure your work area is covered and you are not working on an unprotected surface. We recommend working on the Sculpey® Work ‘n Bake Clay Mat, wax paper, metal baking sheet, or disposable foil. Uncured clay may damage unprotected furniture or finished surfaces. Be sure to cover your crafting area appropriately. Start with clean hands, unwrap and knead clay until soft and smooth, or condition by running clay though a Pasta Machine. We recommend using a designated machine for clay purposes only. When working with multiple colors, clean hands with soap and water or baby wipes (we have found that baby wipes work best) before switching colors. Shape clay, pressing pieces firmly together. Wash hands after use. Baking:Begin by preheating oven to 275 °F (130 °C). After you are done creating; for best results bake clay on an oven-proof surface such metal, aluminum foil, an index card or the Sculpey® Clay Mat at 275°F (130 °C) for 15 minutes per ¼" (6 mm) thickness according to package directions. Oven safe glass or ceramic surfaces are also acceptable for baking; however please note that the baking times may take longer as the glass or ceramic surfaces take longer to heat up. For best baking results, use an oven thermometer. DO NOT USE MICROWAVE OVEN. DO NOT EXCEED THE ABOVE TEMPERATURE OR RECOMMENDED BAKING TIME.Let’s Get StartedOn a clean surface, roll out a thin slate of clay using any color of your choice.I’m using Sculpey Unicorn Magic Glitter!Once you’ve reached your desired thickness, cover in plastic wrap and lightly smooth it out with your roller.


Making a MacaronUse a circular cutter to make two circles. The cutter over the plastic wrap will give the macaron shell a natural and more realistic puff to it.*If you don’t have a cutter you can bypass this step and make two equal size balls and flatten with your finger until you reach your desired shape and size.


Shaping the ShellsUsing some of the leftover clay, roll out two long, thin pieces and wrap around both the top and bottom of the macaron shell. At this point you can use a q-tip and a small amount of alcohol to remove any dust and/or fingerprints.


TexturizingUse your needle tool to texturize the added piece of clay around the outer part of the top and bottom of your macaron. This will give it a more realistic look. Add blush for the cheeks using pink pearl pigments or any regular blush should work just fine! Texturize both shells using a clean toothbrush.


The EarsMake two equal size balls for the ears. Shape each one into and point and cut off the round end. Position ears and use your needle tool to blend all the way around the base of both ears. Use your dotting tool to add a circular indent in the center, add blush and gently texturize the ears with a clean toothbrush.


The HornUse your dotting tool to make a small indent between the ears where the horn will go and add a tiny amount of bake and bond to the center. I’m using “Unicorn Shine on Glitter” for my horn, but you can switch it up if you’d like.Roll out two cone shapes, place the pointy ends together and twist. Cut off the round end and attach your horn. Blend the base with your needle tool and reinforce it by adding a small strip of clay around the base of the horn.


Making the EyesTake a small amount of black Primo Clay and roll out a very thin log. Cut two small pieces from the log and slightly bend for the eyes. Now you’ll need to cut four additional pieces to make the eyelashes. I recommend using a drop of bake and bond for this step- it will help the lashes adhere to the macaron and it dries clear so there’s no need to worry!


The FillingFor this step I am using Sculpey’sUnicorn Fantasy Pearl, Confetti Glitter, Magic Glitter, Cotton Candy Pearl and Shine on Glitter! Twist your desired colors together and push through a metal pastry tip using the end of your dotting tool to create a colorful filling!*You can bypass this step if you don’t have a piping tool and just use your cutter OR simply shape a round piece of clay to fit in the center.


Shaping the Head PinPlace your round needle nose pliers around the tip of the head pin, pressed firmly and loop. I like to loop it twice to insure that it won’t slip off the jump ring. Then bend the rest of the head pin down in a zigzag to fit in the center of the macaron- This will prevent the pin from ever slipping out.


AssemblyTake the bottom of your macaron shell, place the head pin in the center and add the filling. Apply a small amount of bake and bond and attach the top of the macaron. You can now make any needed adjustments to the eye pin and filling. Bake for an additional 15 minutes at recommended temperature. Let cool before adding gloss or you can always leave it matte.


Make a fun NecklaceAdd a jump ring to the eye pin loop and attach a chain to create a magical necklace that you can either wear or share with a friend!(Extra pictures) *If you’d like to make a magnet out of you macaron just skip step 9 and simply add a magnet to the back with super glue after baking!


