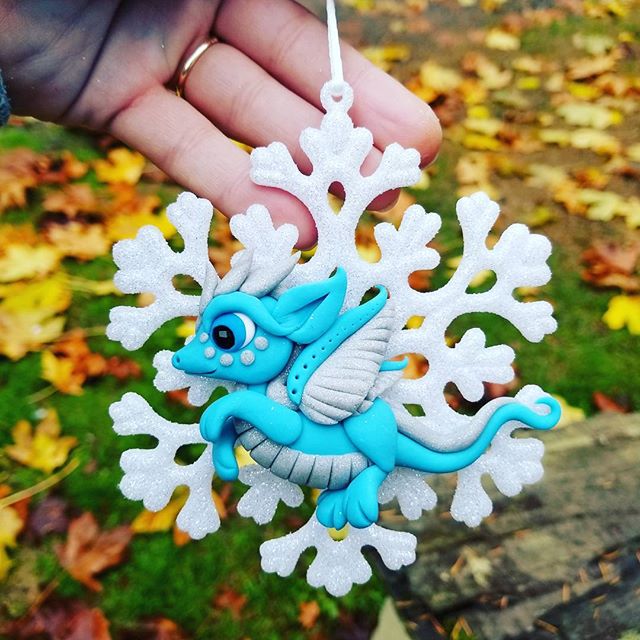
Snowflake Dragon
Snowflake Dragon
Read More
A mix of Sculpey III and premo clay creates this cute dragon!
By: Angela Anderson
Read Less
ADDITIONAL SUPPLIES
1 flat snowflake ornament1/4" black glass bead

Project Instructions
Your workspace: Please make sure your work area is covered and you are not working on an unprotected surface. We recommend working on the Sculpey® Work ‘n Bake Clay Mat, wax paper, metal baking sheet, or disposable foil. Uncured clay may damage unprotected furniture or finished surfaces. Be sure to cover your crafting area appropriately. Getting Started: Start with clean hands, unwrap and knead clay until soft and smooth, or condition by running clay though a Pasta Machine. We recommend using a designated machine for clay purposes only. When working with multiple colors, clean hands with soap and water or baby wipes (we have found that baby wipes work best) before switching colors. Shape clay, pressing pieces firmly together. Wash hands after use. Baking: Begin by preheating oven to 275 °F (130 °C). After you are done creating; for best results bake clay on an oven-proof surface such metal, aluminum foil, an index card or the Sculpey® Clay Mat at 275°F (130 °C) for 30 minutes per ¼" (6 mm) thickness according to package directions. Oven safe glass or ceramic surfaces are also acceptable for baking; however please note that the baking times may take longer as the glass or ceramic surfaces take longer to heat up. For best baking results, use an oven thermometer. DO NOT USE MICROWAVE OVEN. DO NOT EXCEED THE ABOVE TEMPERATURE OR RECOMMENDED BAKING TIME.
Color clays used for this ornament!

Roll 2/3 of the turquoise clay into a ball

Sculpt it into a bowling pin shape

Taper the larger end of the bowling pin into a tail

Sculpt the nose/ cone shaped and smoosh the whole dragon flat

Roll a 1/4 ball of glitter clay

Sculpt into long tear drop and smoosh

Place on the dragons belly, up along its neckline

Using a ball tool make an eye socket

Roll a 1/4 ball of white clay

Push the eye into the eye socket

Place black bead into the eye

Roll a 1/3" ball of turquoise clay

Shape into teardrop and smoosh

Using knife tool make ear mark

Smoosh onto the head right behind the eye

Roll a 1/8" turquoise clay

Taper both ends and place on as eyebrow, guiding the outer end up in a swoop

Using a knife tool make a mouth mark, using a toothpick tool make a nose mark

Using a knife tool make the scale marks onto the white gold chest plate

Make 4 tiny balls in tapering sizes with white glitter clay and place under the eye

Roll a 1/2" ball of white glitter clay

Roll into long snake with both ends tapered, same length as the dragon

Place on the dragons back from just above the eye to the top of the tail.

Roll 3 balls of clay into tapering size from 1/4" to 1/8"

Shape into teardrop

Place largest one on first, just over the eye

The other 2 next

Roll a 1/4" turquoise clay ball and one slightly smaller

Shape into arms

Make finger marks with the knife tool

Place the smaller one on first, behind the dragon

Place the larger one on front

Roll 2 1/4" turquoise clay balls and 1 1/2"

Shape the 2 smaller into teardrop

Shape larger one onto teardrop

Make toe marks with knife tool

Place one foot behind dragon

Place other foot on the front side

Place the larger teardrop on as the thigh

Roll 1 1/2" and 1 1/4" balls of white glitter clay

Shape into teardrop and smoosh into wing shape

With a knife tool make the feather marks

Roll 1 1/8" and 1 slightly smaller of turquoise clay balls

Shape into snake with only one end tapered

Place onto wings

Place small wing on first

Place larger wing on

Using toothpick tool make dots going up the turquoise on the larger wing

Bake according to clay package

Using this glue

Glue cooled piece to the ornament

Using a wire twine secure it and let glue dry overnight

Finished product


