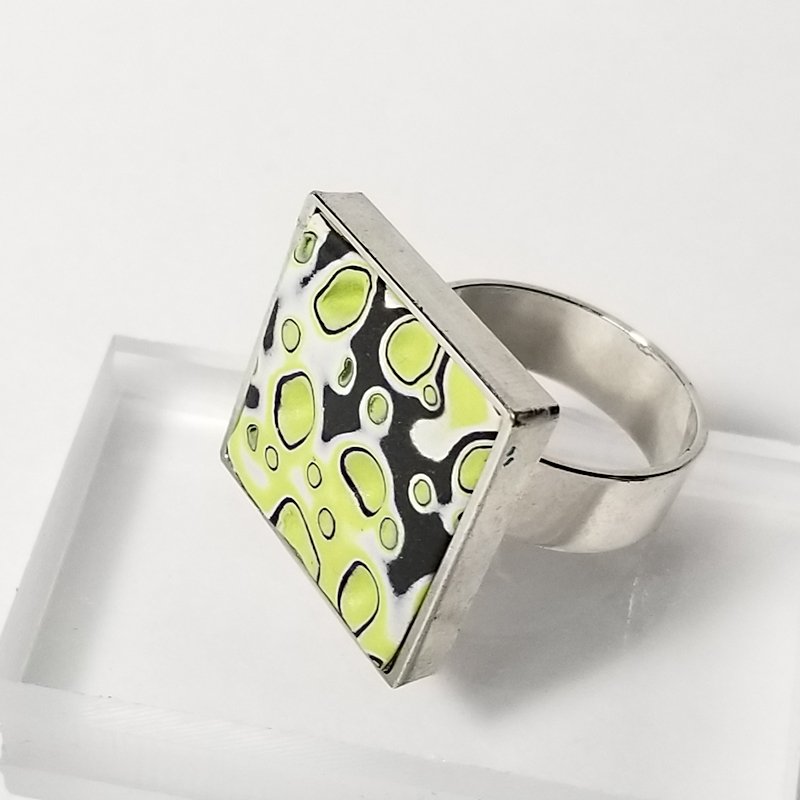
Sculpey Souffle 3-Color Mokume Gane Cocktail Ring
Sculpey Souffle 3-Color Mokume Gane Cocktail Ring
Designed by Syndee Holt
Read More
Read Less
Three small layers of contrasting Sculpey Souffle clay colors create a unique pattern that is so striking in a ring setting! Like the way yours turned out - why not make a matching pendant?
ADDITIONAL SUPPLIES
Three small layers of contrasting Sculpey Souffle clay colors create a unique pattern that is so striking in a ring setting! Like the way yours turned out - why not make a matching pendant?

Project Instructions
- Getting Started:
Start with clean hands, unwrap and knead clay until soft and smooth, or condition by running clay though a Pasta Machine. We recommend using a designated machine for clay purposes only. When working with multiple colors, clean hands with soap and water or baby wipes (we have found that baby wipes work best) before switching colors. Shape clay, pressing pieces firmly together. Wash hands after use.
- Baking:
Sheet each of the conditioned clays out on the third from the widest setting on the clay conditioning machine. Use the 1-inch square cutter to cut out a square of each of the colors. Set the remaining colors back with the other unused clay.

Stack the 3 layers on top of each as shown.

Run the stacked clays through the clay conditioning machine on the same setting as before. Accordion fold the stack as shown. Repeat this process one more time. Place the folded clay on the small smooth tile. Roll over the clay with the acrylic with light-medium pressure to seal the folded layers.

Press the medium and small Style n’ Detail tools into the clay in a random pattern. Start with the medium and then fill in the spaces with the smaller tool.

Make a thin slice across the top of the clay. It may make it easier to slightly curve the blade with your thumbs on the top of the blade. Set this top slice to the side.

You can make the same slices on the edges of the stack of just use the stack as it is. Position the square ring finding in an interesting spot and firmly press it into the stack. Remove the ring and trim to the marks left by the edges of the ring.


Gently fit the trimmed square to the ring finding. Use your Super Slicer to remove any excess clay on the top edges of the finding. Bake as directed. Once the ring has baked and cooled, use a craft blade to gently remove the baked clay. Apply the instant glue to the finding and press the clay back into place.


Remember that first slice? Why not put that slice on a small piece of conditioned Raspberry, rolled out on the widest setting. Gently roll it into place with the acrylic roller, then use the medium Style n’ Detail tool to texture in the larger holes. (Don’t use the smallest tool again). Then repeat the steps above to add it to another jewelry finding.


