Skip to product information
1 of 2

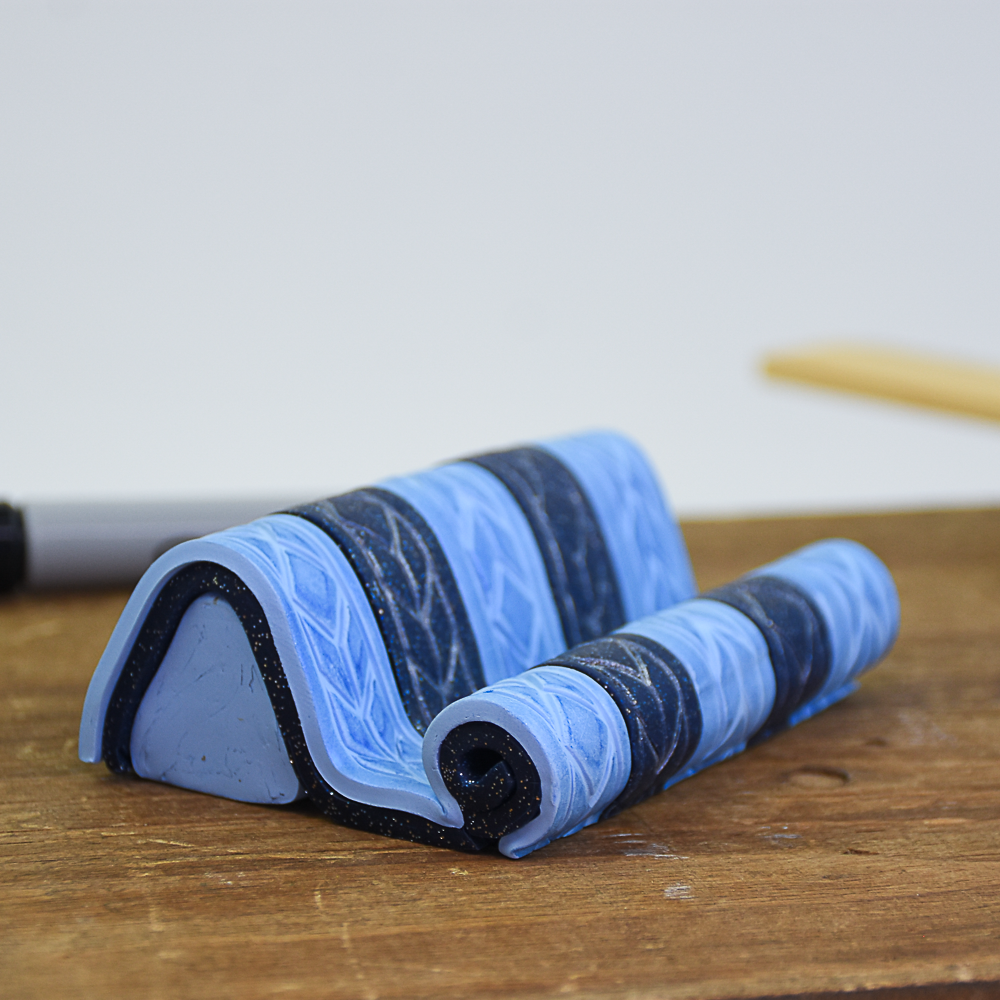
Sculpey Premo™ Knit Textured Phone Holder

Sculpey Premo™ Knit Textured Phone Holder

Designed by Amy Koranek
Read More
Banish the boring cell phone holder and display this gorgeous knit patterned holder that you can create in an afternoon! NOTE: THIS PROJECT REQUIRES 2 BARS OF EACH CLAY COLOR TIME TO COMPLETION: 2 Hours to make and bake
Read Less
ADDITIONAL SUPPLIES
  • Pearl mica powder
  • Dark blue mica powder
  • Small paintbrush
  • Transparent tape
View full details
Project Instructions

Step 1

Getting Started:

Please make sure your work area is covered and you are not working on an unprotected surface. We recommend working on the Sculpey® Oven-Safe Work Mat, wax paper, metal baking sheet, or disposable foil. Uncured clay may damage unprotected furniture or finished surfaces. Be sure to cover your crafting area appropriately.

Start with clean hands, unwrap and knead clay until soft and smooth, or condition by running clay though a Pasta Machine. We recommend using a designated machine for clay purposes only. When working with multiple colors, clean hands with soap and water or baby wipes (we have found that baby wipes work best) before switching colors. Shape clay, pressing pieces firmly together. Wash hands after use.

Baking (also called Curing):

Begin by preheating oven to 275 °F (130 °C). After you are done creating; for best results bake/cure clay on an oven-proof surface such metal, aluminum foil, an index card or the Sculpey® Clay Mat at 275°F (130 °C) for 30 minutes per 1/4" (6 mm) thickness according to package directions.
Oven safe glass or ceramic surfaces are also acceptable for baking/curing;
however please note that the baking/curing times may take longer as the glass
or ceramic surfaces take longer to heat up. For best baking results, use an
oven thermometer.

DO NOT USE MICROWAVE OVEN. DO NOT EXCEED THE ABOVE TEMPERATURE OR RECOMMENDED BAKING TIME.

Step 2

I made this phone stand to fit my iPhone 11 Pro. You may need to tweak the sizes to accommodate your own phone depending on its size and shape. I decided to make the phone stand entirely from oven bake clay -instead of using fillers or
armatures- because I realized after experimenting with the project for a bit,
that some weight was needed to balance the phone. The oven bake clay provided
just the weight that I desired. You may want to use scrap clays as weight if
possible.

I also designed this stand to hold my phone either horizontally or vertically.

Make a thick, approximately 1” on each side, triangle log shape from 3/4 bar Pale Blue that is 3” wide. This will be the support for the stand.

Position the triangle log securely on the work surface on one of its sides.

Step 3

Prepare 1/8” thick sheet from Galaxy Glitter that is 3” x 5”.

Drape sheet over the two top sides of the Pale Blue triangle log.

Make sure the Galaxy Glitter sheet adheres to the Pale Blue log without trapping air bubbles.

Lay the excess Galaxy Glitter sheet flat down on the work surface.

Step 4

Bend the front edge (the edge opposite the triangle log) up to start rolling it.

Step 5

Continue rolling the front edge up tightly until a small gap remains between this log
and the triangle base that is slightly larger than the thickness of your phone.

Step 6

Sheet more Galaxy Glitter to 1/8” thick and roll it down to the work surface. This
sheet should be at least 4” long.

Roll the sheet in parallel lines using the Knit Texture Wheel. Make extras so you have several to choose from.

For the final design, I only need two of the strips.

Step 7

Coat the surface of the textured sheet with pearl mica powder, using a paintbrush to
make sure it gets down into the texture.

Step 8

Now we will lift the mica powder off of the surface of the texture and leave it in the grooves. We will do this using transparent tape (the kind you use to wrap a
gift).

Burnish one piece of tape at a time down to the surface of the texture. Carefully peel the tape off which will lift most of the mica powder from that area.

Step 9

Keep applying tape and lifting it off. Discard used tape.

Step 10

We are ultimately going for a look where the surface mica powder is removed and the powder remains in the textured grooves.

Step 11

Sheet Pale Blue to 1/8” thick and roll it down to the work surface. This sheet should be at least 4” long.

Roll the sheet in parallel lines using the Knit Texture Wheel. Make extras so you have several to choose from.

We will need only three strips for the final design.

Step 12

This time we will apply dark blue mica powder using fingertips to only apply it to
the raised surfaces - not to the textured grooves.

Step 13

Carefully cut out the textured strips with a Clay Blade.

Starting in the middle of the stand, drape the strips over the stand following the shape of the stand carefully. Use careful fingertip pressure to attach the strips to
the Galaxy Glitter background without distorting the texture or the mica
powder.

Let the excess strips of clay drape over and fall off the front roll.

Step 14

Here’s a view from the top of the stand. The strips go across the triangle base all the
way to the bottom at the back.

Step 15

Keep adding the textured strips until the whole stand is covered.

Step 16

Trim the excess strips using the Clay Blade.

Step 17

Carefully make sure your phone will fit into the groove left between the front roll and the back triangle.

Bake/cure following the baking instructions for Sculpey Premo™.

Allow to cool completely before installing your phone.