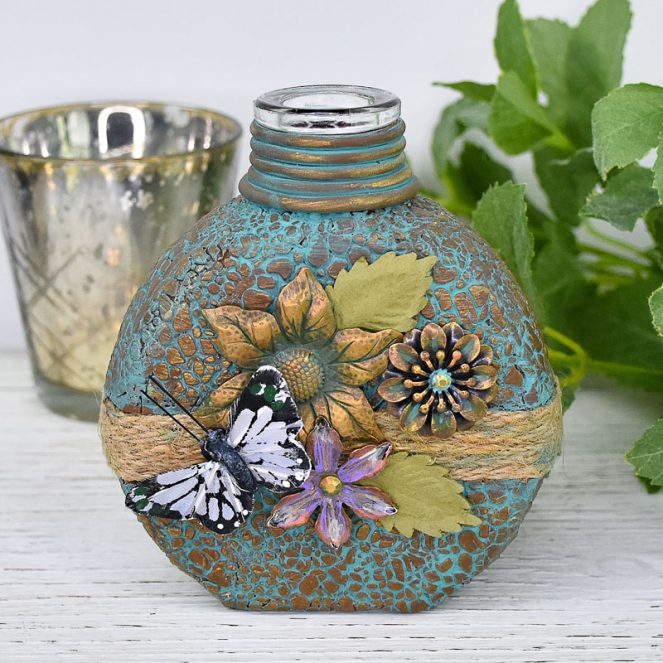
Sculpey III Mixed Media Blossom Vase
Sculpey III Mixed Media Blossom Vase
Read More
Read Less
This intriguing little vase is perfect for the top of a stack of books on the shelf or a bathroom vanity. Dig through your stash of crafting supplies to find items to decorate it!
Time to completion:
60 minutes plus baking times (2)
ADDITIONAL SUPPLIES
• Glass vase-this one is about 4 inches tall
• Flexible texture or texture roller
• turquoise and gold acrylic craft paint and brush
• inexpensive cosmetic wedge sponge
• baby wipes
• instant glue
• a mix of metal flowers, paper butterfly and felt leaves.
• Cording or twine to wrap around the middle of the vase (optional)

Project Instructions
- Getting Started:
Start with clean hands, unwrap and knead clay until soft and smooth, or condition by running clay though a Pasta Machine. We recommend using a designated machine for clay purposes only. When working with multiple colors, clean hands with soap and water or baby wipes (we have found that baby wipes work best) before switching colors. Shape clay, pressing pieces firmly together. Wash hands after use.
- Baking:
Because I didn't want to hassle with giant sheets of clay, I glued some twine around the middle of the vase - giving me added interest as well as separating the areas to be covered into smaller portions. Sheet about half a block of the conditioned Hazelnut clay out on the middle thickness setting on the clay conditioning machine. Wrap it around the top portion of the vase, trimming the upper edge by the neck. Repeat on the other side of the upper portion, taking care not to over lap the clay too much, which will make it lumpy. Use the Acrylic roller to help press the clay into place and smooth the seams.


Once you have the top covered, you can use your flexible texture or texture roller (this one is a large acrylic roller from greenstuffworld.com). Extrude a small amount of clay with the single circle dye to wrap around the neck of the vase. Bake the vase according to the directions in step 1.

The top portion of the vase should now be baked and cooled. Repeat this process for the bottom portion of the vase. While the vase is baking, you can add simple acrylic colors to your metal flowers to add more drama and color to the design.


Once the entire vase is baked and cooled, wash the turquoise paint over a portion of the top of the vase and quickly wipe off the excess paint from the top portions of the designs with a baby wipe (or a wet paper towel). Repeat as necessary to cover the vase. When the turquoise paint has dried, apply a small amount of the Gold paint to the cosmetic wedge sponge and slightly brush on the upper surfaces of the texture.


Once all the paints have dried, use the instant glue to glue your mixed media items to the front of the vase. Your new vase is complete!


