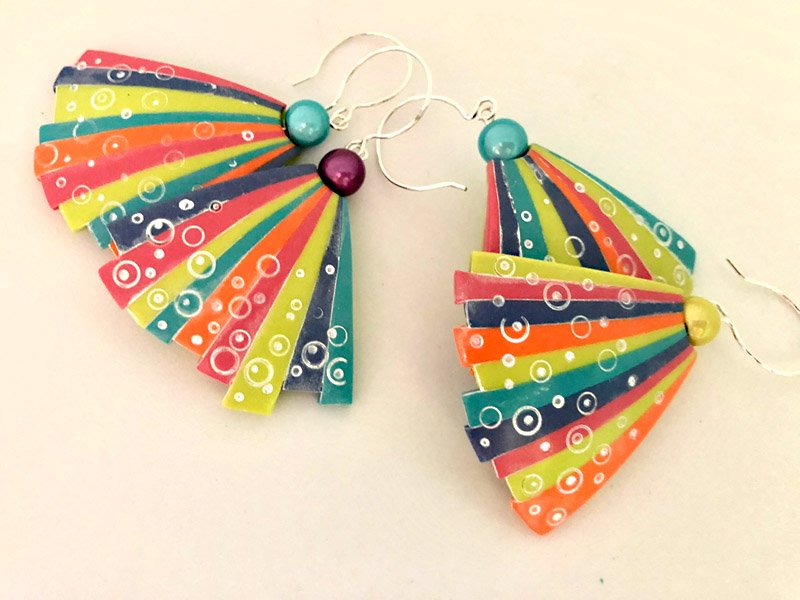
Premo Multicolored Parasol Earrings
Premo Multicolored Parasol Earrings
Read More
The sun, beach, colours, reflection of the sunlight on water... summer is here! A summer outfit cannot do without a summer accessory: earrings twirling in the wind and reminding you of colours and beauty typical of this season. And if you want, you can also create a necklace by simple enlargement of the project.
Design by Petra Nemravová
Read Less
ADDITIONAL SUPPLIES
Deli paper; ;;Acrylic paint – white; Wet wipes; Sandpaper; For finishing the earrings: Drill (1 mm); 2 eyepins, 2 fishooks; 2 shining beads; Superglue (Loctite gel)

Project Instructions
- Getting Started:
Start with clean hands, unwrap and knead clay until soft and smooth, or condition by running clay though a Pasta Machine. We recommend using a designated machine for clay purposes only. When working with multiple colors, clean hands with soap and water or baby wipes (we have found that baby wipes work best) before switching colors. Shape clay, pressing pieces firmly together. Wash hands after use.
- Baking:
First, condition all colors of clay and cut in half. Add the same amount of Pearl clay to each color.


Trim the jagged edges and cut off 2-3 (5-9 mm wide or 1/4 inch) sheets out of each color sheet. The length and width of the rectangles may vary.

Cut the rectangles in two diagonally and get triangles. They should vary in length and width slightly.

Put the triangles one next to another on deli paper and create a kind of fan. Squeeze them together by means of the blade – if you do it with the blade, their shape will not distort at the edges. Simultaneously cut off the wide ends as you desire – their length is different on purpose.


Follow the same procedure until you like the shape of the earring. Your fan can be a half round or smaller (see the image).

Smooth out the joints over deli paper using your fingers or a roller (so that you do not distort the shape).

Embellish the wider (outer) ends of the earrings using the small Style and Detail tool and the small and medium Etch n' Pearl


Cut out a small sector of a circle in the tip of the fan by means of the small circle mini cutter (see the image).

If the earring is too thin, underlay it with a cut out clay round (middle setting of the pasta machine is enough) and trim it by tracing the shape of the earring. This step is suitable when drilling a hole into the clay from an upper side. If you choose another way of finishing the earring, e.g. sticking a fishhook with a bezel, or drilling a hole in the front side), you can omit it.


Mark a hole in the middle of the clay by means of a needle tool before baking - drilling will be easier afterwards.

Place your piece of work (i.e. two earrings) on the hollow bead maker (largest size) and bake it for 30 minutes at the directions in Step 1. Let it cool after baking. I do not press the clay onto the Hollow Beadf Maker intentionally, only the point. The earrings become round themselves thanks to the hot temperature.

Apply acrylic paint into the holes of the earrings and wipe the excessive paint with wet wipes. The fine white coat on the clay can be sanded with soft sandpaper. If the edges of the earrings are too sharp, make them round by means of sandpaper as well.


Drill a small hole at the marked spot in the middle of the sector of a circle (i.e. at the point of the earring).

String a bead on the eyepin and insert it into the drilled hole. If the eyepin is too long, cut it with pliers. Test it first without glue: the needle should not be visible between the bead and the earring. If it is okay, apply glue at the end of the eyepin and insert it into the drilled hole. Let it dry.

Add your earring findings and you are done!


