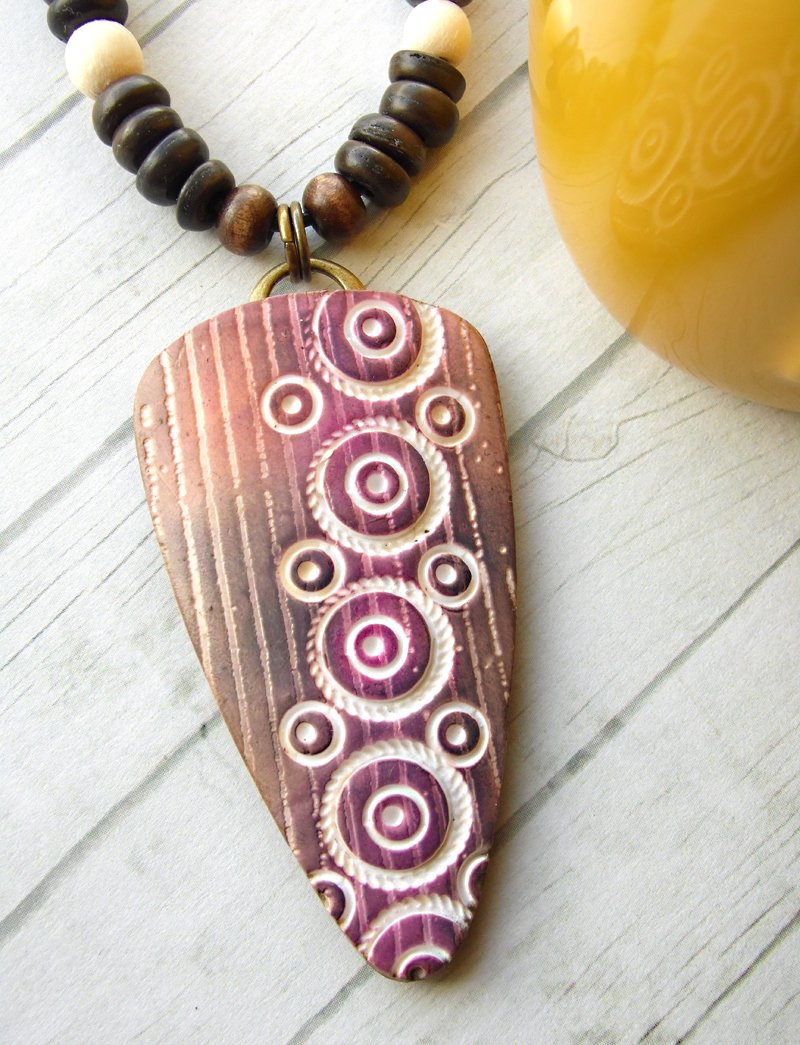
Premo! Ink and Textured Veneer Pendant
Premo! Ink and Textured Veneer Pendant
Read More
Have you tried using inks and pastels as a surface treatment on polymer clay? Both craft items work perfectly with polymer clay and give the clay’s surface beautiful, rustic color. As for ‘‘mark makers,’’ they are everywhere! ...in your kitchen ... in your garage ... and in your craft stash. Following is a technique that shows how to use inks, pastels, chalks and mark makers to make one-of-a-kind designs.
Design by Lorraine Vogel of Wired Orchid www.wiredorchid.com
Read Less
ADDITIONAL SUPPLIES
Archival ink pads, Pastels or soft chalks, Cosmetic or craft sponges, Sponge pastel applicator, Strong super glue, Several stamps or items to use as mark makers, Metal shape cutter (s) or templates,
Small, smooth ceramic tile, Xacto knife, White glue or liquid polymer clay, Jump ring (s), Varathane Polyurethane, Optional: Glass jar, Sandpaper

Project Instructions
Getting StartedPolymer clay may stain. CLAY MAY DAMAGE UNPROTECTED FURNITURE OR FINISHED SURFACES. DO NOT USE polymer clay on unprotected surfaces. We recommend working on the Sculpey clay mat, wax paper, metal baking sheet, or disposable foil. Start with clean hands and work surface area. Knead clay until soft and smooth. For best results, clean your hands in between colors. Shape clay, pressing pieces together firmly. Bake on oven-proof glass or metal surface at 275°F (130 °C) for 30 minutes per ¼" (6 mm) thickness. For best baking results, use an oven thermometer. DO NOT USE MICROWAVE OVEN. DO NOT EXCEED THE ABOVE TEMPERATURE OR RECOMMENDED BAKING TIME. Wash hands after use. Baking should be completed by an adult.Begin by preheating oven to 275 °F (130 °C). Test temperature with oven thermometer for perfectly cured clay. For best results, condition all clay by running it through the Clay Conditioning Machine for several passes on the widest setting. Fold the clay in half after each pass and insert the fold side into the rollers first.
PREPARE THE CLAYTo achieve the best results for this technique, use clay that has been leached of excess plasticizer. Roll out white Premo clay to about 1/16’’ or a middle setting on your pasta machine. Place the thin sheet of clay between two clean sheets of white paper, then place the clay and paper under a heavy object (a book, for example) for about an hour. You will see excess plasticizer on the paper. After leaching, roll the thin clay sheet with the acrylic roller onto a small, clean ceramic tile.
CREATE A CLAY VENEER Choose your first tool to make marks. Make random marks or form a pattern in the white clay. Do not press so hard as to poke through the clay sheet, but hard enough to make a good impression. Continue with other tools to create a pleasing pattern in the clay.


Choose two or more archival ink colors and a few clean sponges (craft or cosmetic). Press a sponge onto an ink pad several times, then dab the ink onto the white clay. Making a slight swiping motion when dabbing will help keep the ink out of the indented areas. When you have put the first color in the areas you prefer, let the ink dry for a few minutes. Select another color and continue to cover the white clay with ink. Go back and apply ink to areas to deepen the color where desired


Choose one or two complimentary colors of pastels or soft chalks. I like to use brown or dark gray to accent the inked areas and darken some of the ink. With your finger or small sponge applicator, dab the pastel or chalk here and there on the inked clay. Your veneer is now ready to use in your project!


CREATE A FINISHED PIECE USING VENEER Choose a shape cutter or template or cut pieces freehand. Cut out your jewelry piece. Optional: Add pastel or soft chalk to edges of the cut out piece. Adhere the piece to a glass jar or tile. Smooth the shape so it lies flat on the tile or glass. Bake according to the directions above. (Tenting the piece with foil helps keep the ink from fading.)


Glue a jump ring to the top on the back of the baked veneer. Using white craft glue or liquid clay, apply a thin layer to the back of the baked piece. Let dry a few minutes.

Lay the glued front piece onto another thin sheet of white clay. Using an Xacto knife, trim out the back of the piece using the front of the piece as a guide. Carefully press both pieces together. NOTE: It is recommended that you add a small amount of glue or liquid clay to the back of the baked piece before adding the unbaked clay.


Optional: Use a piece of sandpaper or stamp to texture the back and add a signature stamp.


Smooth the back’s edges. Optional: Coat the sides and back of the piece with pastel or soft chalk. Tent with foil again and bake again.

Apply a thin coating of varnish to seal the ink and pastels/chalk. (I use Varathane Polyurethane.) Let dry thoroughly. A second coat of varnish can be applied, if desired.


Here are some other samples of mark makers that Lorraine has used for her unique style.


