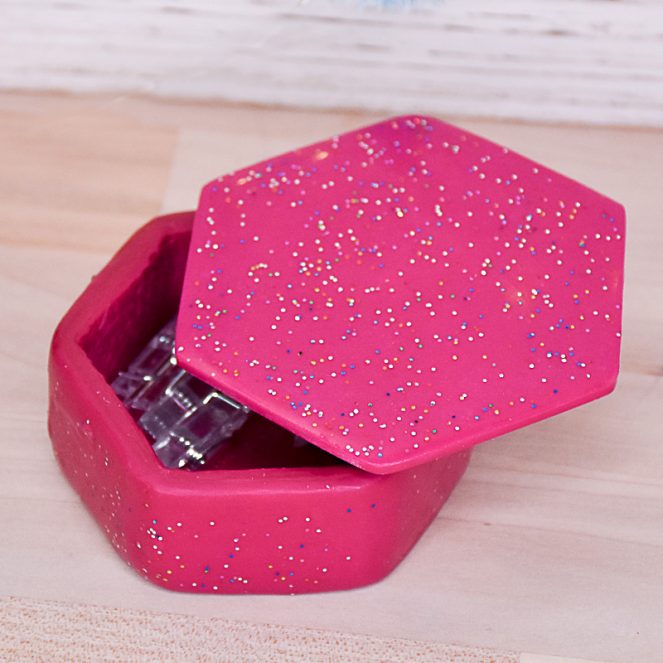
Sculpey Premo™ Fuchsia and Liquid Sculpey® Confetti Clear Trinket Box
Sculpey Premo™ Fuchsia and Liquid Sculpey® Confetti Clear Trinket Box
Read More
Read Less
Premo clay builds the structure for your box and Confetti Clear Liquid Clay adds the sparkle! Of course, you can select from the full range of Premo colors to make your own box.
ADDITIONAL SUPPLIES
• Hexagon Cutters
• Disposable 1” Paint brush
• Disposable Wide Mouth Jar
• Popsicle Stick
• Baking Parchment

Project Instructions
- Getting Started:
Start with clean hands, unwrap and knead clay until soft and smooth, or condition by running clay though a Pasta Machine. We recommend using a designated machine for clay purposes only. When working with multiple colors, clean hands with soap and water or baby wipes (we have found that baby wipes work best) before switching colors. Shape clay, pressing pieces firmly together. Wash hands after use.
- Clay Baking:
- Liquid Sculpey Baking:
Select the size cutter/form you want to use for your box. (You’ll also need the next size up for the lid.)

Make both packs of Premo Fuchsia into flat sheets on the #1 (thickest) setting of your clay machine. Wrap the cutter in an even strip and trim. Bake at 275 °F for 45 minutes. Cool.

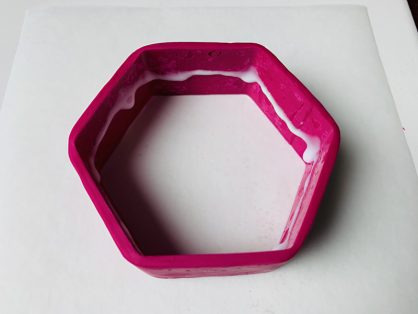
Run a strip of clay thru the machine on a #4 setting. Create texture with one or more sections of the Sculpey Texture Sheet. Spread Oven Bake Clay Adhesive evenly inside the hexagon walls. Gently place the strip, texture side out, in the hexagon. Trim. Bake at 275 °F for 30 minutes. Cool.


Place the hexagon on a #1 sheet of Fuchsia. Cut around the outside to form the box bottom. Adhere with Oven Bake Clay Adhesive and bake for 30 minutes. Cool.

make a strip of Fuchsia on a #2 setting. Apply Oven Bake Clay Adhesive thinly and evenly. Apply the strip around the outside of the box, pushing out air pockets as you go. This is the final exterior; so, take your time creating the join and smoothing the strip. Bake for 30 minutes. Cool.

Press the box into a #1 sheet of fuchsia. Cut inside the innermost line to create a ledge for the lid.

Cut lid from a nice, smooth #1 sheet of fuchsia. Leave the clay in the cutter. Adhere the ledge- hexagon on the inside of the lid with Oven Bake Clay Adhesive. Make sure it’s as centered as possible. Note: The fit of the lid will never be exact, because no cutters are exact; but it turns out great anyway. Place lid face down on parchment and bake at 275 °F for 30 minutes.

While your lid is baking, prepare the Sculpey Confetti Clear. Pour the whole bottle into a small, wide-mouth jar. Stir the liquid clay thoroughly with the popsicle stick, scraping the sparkles from the bottom and the sides, until the confetti is evenly distributed. Pour half of the Confetti Clear back into the bottle. Thin the rest with about 6 drops of Sculpey Clay Softener. The liquid clay should be thin enough to brush on evenly without dragging. Once your box is finished, you can add the leftover, thinned clay back into the original bottle. Brush Confetti Clear on one side of the box at a time, baking for 20 minutes at 300F after each application. I did 2 coats. Apply an even coat of Confetti Clear to the top of the box. (I also did two coats on the lid.) Bake for 20 minutes at 300 °F. Cool.

You can further clarify the Liquid clay with the heat gun method. Heat Gun Finishing Tips: I recommend you make a small #1 slab of the fuchsia, bake it, cool, apply the Confetti Clear and practice. You’ll quickly learn the tricks of heat gun use without risking damage to your creation. Heat guns create maximum shine. For this project, use a heat gun on the lid only. Watch carefully while you slowly move the heat gun side to side. When you see the sparkle increase in one area, move to another area.


