Skip to product information
1 of 1

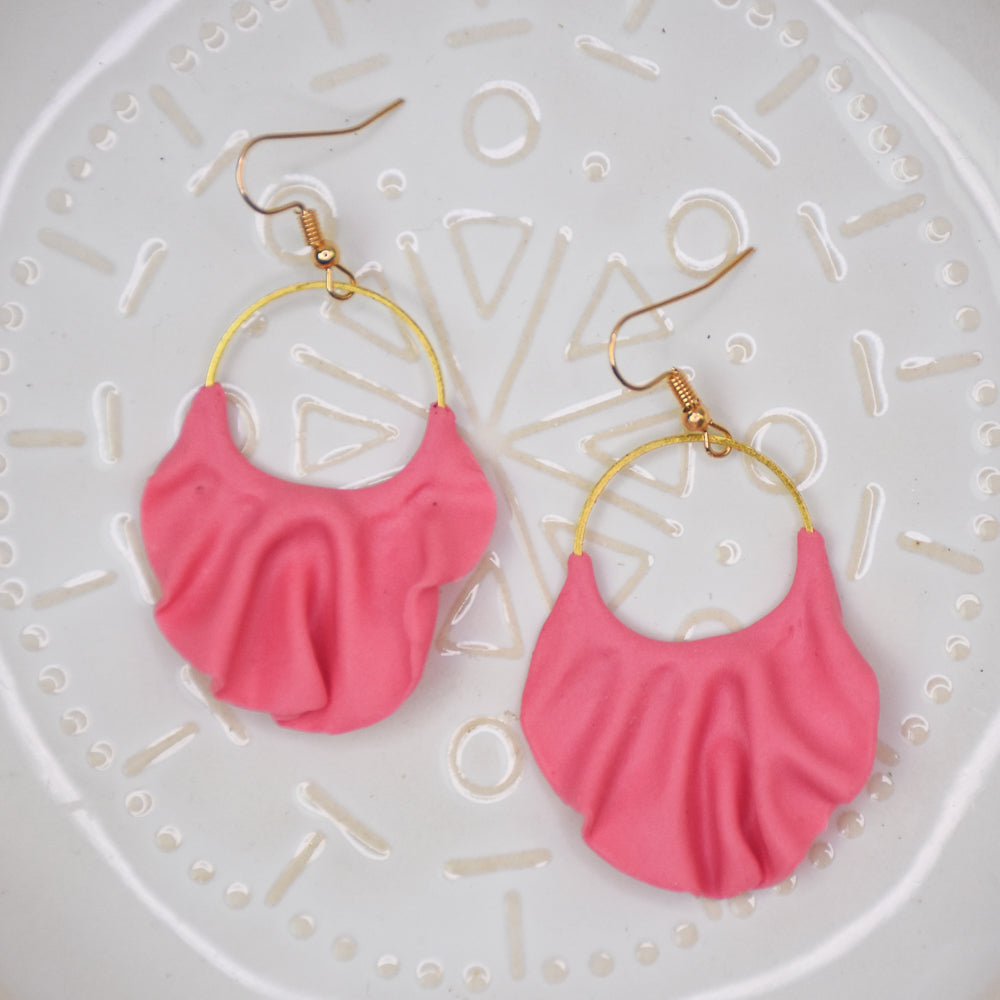
Sculpey Soufflé™ Organic “Pleats-on-a-Ring” Earrings

Sculpey Soufflé™ Organic “Pleats-on-a-Ring” Earrings

Designed by syndee holt
Read More
The organic nature of this design adds intrigue to a simple circle of Soufflé™ Guava. Add a touch of gleaming metal with the flat ring to really amp up the richness of the design. The combination of Sculpey Tools™ really help make the design come to life! TIME TO COMPLETION: 30 mins to make / 30 mins to bake
Read Less
ADDITIONAL SUPPLIES
  • Circles – Etsy Domed Bazaar  25 mm (1 inch) brass circles (2 per pair)
  • Gold-toned ear wires (2)
View full details
Project Instructions

Step 1

Getting Started:

Please make sure your work area is covered and you are not working on an unprotected surface. We recommend working on the Sculpey® Oven-Safe Work Mat, wax paper, metal baking sheet, or disposable foil. Uncured clay may damage unprotected furniture or finished surfaces. Be sure to cover your crafting area appropriately.

Start with clean hands, unwrap and knead clay until soft and smooth, or condition by running clay though a Pasta Machine. We recommend using a designated machine for clay purposes only. When working with multiple colors, clean hands with soap and water or baby wipes (we have found that baby wipes work best) before switching colors. Shape clay, pressing pieces firmly together. Wash hands after use.

Baking (also called Curing):

Begin by preheating oven to 275 °F (130 °C). After you are done creating; for best
results bake/cure clay on an oven-proof surface such metal, aluminum foil, an
index card or the Sculpey® Clay Mat at 275°F (130 °C) for 30 minutes per
1/4" (6 mm) thickness according to package directions. Oven safe glass or
ceramic surfaces are also acceptable for baking/curing; however please note
that the baking/curing times may take longer as the glass or ceramic surfaces
take longer to heat up. For best baking results, use an oven thermometer. DO
NOT USE MICROWAVE OVEN. DO NOT EXCEED THE ABOVE TEMPERATURE OR RECOMMENDED BAKING TIME.

Step 2

Condition about 1/3 the bar of Soufflé Guava and sheet or roll out to a thin square, (I've used the #6 setting on my clay conditioning machine (pasta machine).

Use the smallest (.75 inch) cutter to cut out a circle of this clay sheet. Note that I've cut this circle out towards the TOP of the square of clay.

Step 3

Use the clay blade to trim off the top of the circle, leaving slightly more than half of the circle on the original sheet as shown.

Step 4

Use the largest circle cutter (2-inches) to trim the clay, placing the cutter as shown.

Step 5

Determine which side of the circle will be the front of your earring and place that side face down. Position the brass ring with just a small amount of clay showing on the inside of the ring.

Step 6

Starting on one side, gently fold that edge back over the brass ring using your finger to fold and spread the clay slightly.

Step 7

Here is a look at my finished earring back.

Step 8

Turn the earring right side up and begin to gently pinch soft folds in the clay using your thumb and forefinger.

Step 9

Gently squeeze the pleats as you work along the earring.

Step 10

Here is a look at my earring so far.

Step 11

At this point, I found it easier to position the earring on the Hollow Bead Maker as shown and use the medium Dual Ended Tool to help soften and define the grooves.

Step 12

Complete steps 1-11 above to create your second earring.

Step 13

I opted to move my earrings on the Hollow Bead Maker as shown, using the space between 2 of the bumps to achieve a more natural "flow" to the folds.

Bake the earrings according to the directions in Step 1 above.  Allow to cool before removing them from the Hollow Bead Maker.

Step 14

Final assembly is easy! Just add your ear wire by opening the small loop on the ear wire and slipping the brass circle through it and close the loop.

Step 15

Here is a look at my final earrings.