Skip to product information
1 of 1

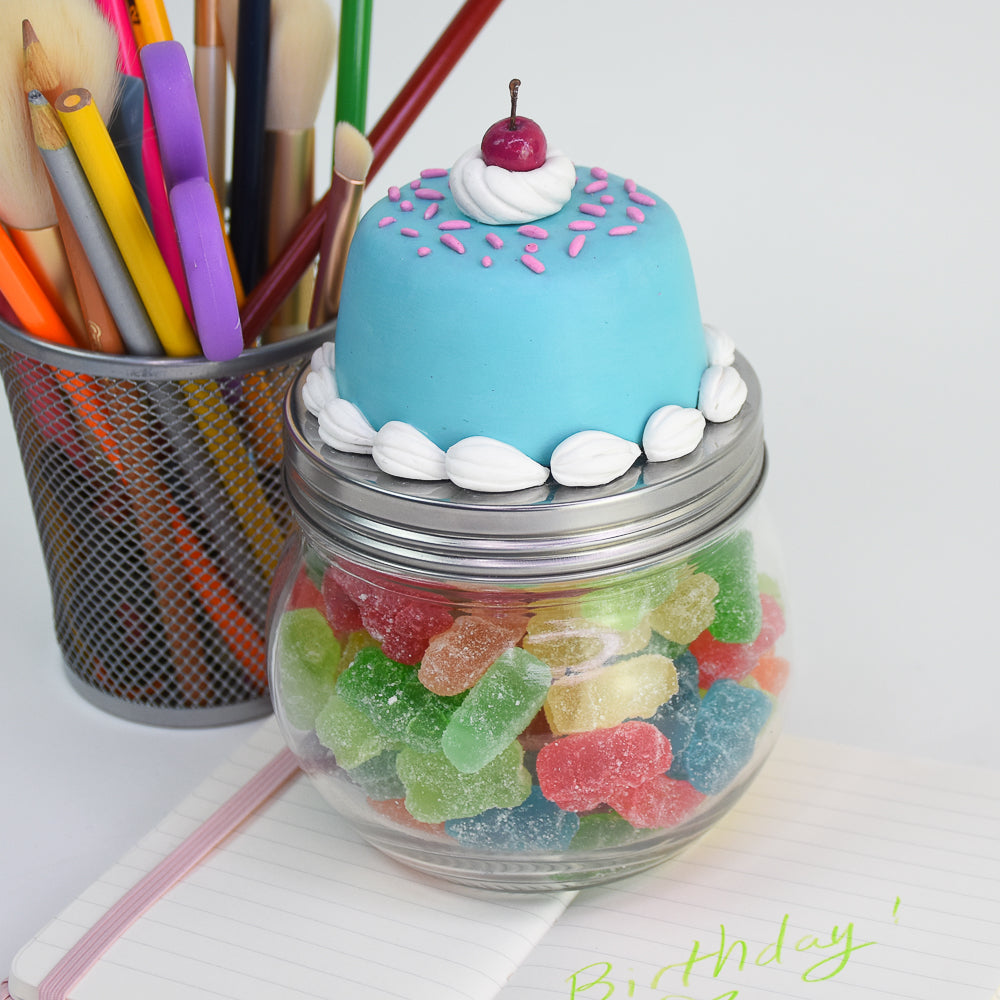
Sculpey Air-Dry™ Cupcake Topped Jar

Sculpey Air-Dry™ Cupcake Topped Jar

Designed by Linda Hollander
Read More
This cute little cupcake topped treat jar will be a hit whether you give it as a gift filled with treats or keep it for yourself! TIME TO COMPLETION: 3 hours work over 3-day period of drying time
Read Less
ADDITIONAL SUPPLIES
  • 18 oz. glass jar 4” wide x 5” tall  or jar of choice
  • Craft foam cone 2.75” x 6”
  • DecoArt Americana Acrylics:
  • Aqua Sky, Berry Cobbler, Dark Chocolate, DuraClear Soft Touch Varnish, Triple Thick Brush-on Gloss Glaze
  • Craft mat
  • Flat paint brush: medium
  • Needle tool or toothpick
  • Tweezers
  • Craft knife
  • Serrated steak knife
  • Craft wire
  • Fine grit sanding pad
  • White glue
  • Strong glue such as E6000
  • Latex glove 
View full details
Project Instructions

Step 1

Getting Started with Sculpey Air-Dry™ :

Please make sure your work area is covered. We recommend working on the Sculpey® Oven-Safe Work Mat, wax paper, or disposable foil.

Start with clean hands, unwrap the amount you think you will use and knead clay until soft and smooth.  Wash hands after use. Wrap any extra clay in then wrapper and then put in an airtight container.

While your Sculpey Air-Dry™ creations will dry on their own, you can also cure more quickly by baking them in your home oven at 200 °F.  The baking
duration depends on your clays thickness-thin pieces should bake for a minimum
of 20 minutes, while thick pieces should bake long with frequent checks for
hardness.

 Clay Tips from the Artist:

  • Use water on your fingertips or clay roller to help smooth clay as needed.
  • When rolling clay sheets, use the Super Slicer to lift the sheet and turn over after each roll to prevent the clay from sticking tightly to your work surface.
  • To speed up drying time, place the project in a sunny window or next to a warm
    heat vent.

Step 2

Cake Form: Use the serrated knife to cut a 2” piece off the bottom of the foam cone. Brush off loose particles.

Step 3

Cake frosting: Use the clay blade to cut off a piece of clay off the brick then roll into 1 1/2” ball. Use the clay roller to roll into a sheet 1/8” thick. Apply a thin layer
of white glue to the short end of the cake form then place the clay sheet on
top. Use the clay roller to press clay down gently. Use the craft knife to trim
excess clay from outer edges. Form a 2” ball of clay and roll into a 1/8” thick
sheet. Cut two sheets of clay to wrap around the sides of cake form. Apply glue
then gently press clay sheet, one at a time, to the sides of the cake form. Use
the clay roller to smooth seams. Trim excess clay from the bottom of the cake
form. DO NOT cover the bottom of the form.

Step 4

Let the cake dry thoroughly then sand smooth.

Step 5

Use Aqua Sky to paint cake until opaque. When dry apply 1-2 coats of Soft Touch
Varnish. Use strong glue to adhere cake to the center of lid. Let dry for
several hours.

Step 6

Frosting trim: Roll clay into ½” balls one at a time then roll into a teardrop shape by applying pressure to one side. Use the side of the needle tool or toothpick to make 3 indentations lengthwise. Apply a small amount of white glue to one side and gently press onto bottom of cake. Repeat until the ring of frosting is complete.

Step 7

Cherry and frosting dollop:
Roll a 1/4” ball of clay for the cherry then use the paint brush handle to make
a round indentation in the center. Use the needle tool to make a hole in the
center (to add then stem later). Roll a 5/8” ball of clay for the frosting
dollop then use the end of the craft knife to make an indentation in the center
for the cherry to fit into. Use the needle tool to make diagonal indentations
in the dollop (see final picture). Gently place cherry on the dollop to check
for fit then remove and let both pieces dry. Use Berry Cobbler to paint cherry
until opaque. Apply several coats of Triple Thick Glaze allowing drying time
between coats. Bend one end of the craft wire and cut off ¾” length. Add a tiny
drop of strong glue to one end of the stem and let dry. Paint stem Dark
Chocolate then add a coat of Soft Touch Varnish.

Step 8

Sprinkles:

Mix Berry Cobbler into clay using a glove to mix by hand until well blended. Roll a ball of clay then roll into a very long thin snake. Use the craft knife to cut into small pieces.

Assembly:

Use strong glue to adhere frosting dollop to top center of the cake. Glue cherry into dollop then glue stem into cherry. Use tweezers and white glue to adhere sprinkles on top of the cake. When it is dry add several light coats of Soft Touch Varnish.