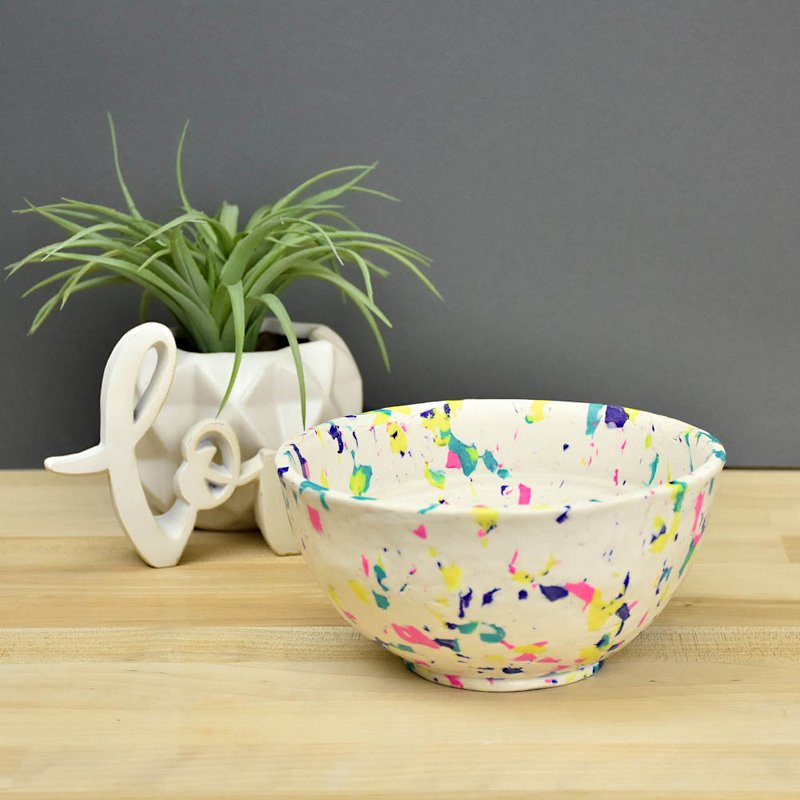
Original Sculpey and Sculpey III Terazzo Style Planter
Original Sculpey and Sculpey III Terazzo Style Planter
Read More
Read Less
Sculpey clays make this classic technique is very easy to master. Once you get the hang of it you can find ways to incorporate the look of terrazzo into home decor, jewelry, and garden designs..
ADDITIONAL SUPPLIES
- Deep ceramic soup bowl
- Corn starch
- Flexible measuring tape
- Heat gun

Project Instructions
- Getting Started:
Start with clean hands, unwrap and knead clay until soft and smooth, or condition by running clay though a Pasta Machine. We recommend using a designated machine for clay purposes only. When working with multiple colors, clean hands with soap and water or baby wipes (we have found that baby wipes work best) before switching colors. Shape clay, pressing pieces firmly together. Wash hands after use.
- Baking:
To make a planter this size you will need 1 pound of Original White Sculpey®, and 1/4 bar each of Purple, Teal Pearl, Yellow, and Candy Pink. Start by sectioning the 1 pound of Original White Sculpey® into thin slices

This project will be most easily managed if you place all the clay in the middle of a piece of white copier paper or Sculpey silicone baking mat. That way you can keep all the little bits on the paper/mat and easily pick them up without them sticking to your work surface. With the Super Slicer, chop the pieces of clay into small pieces.

Keep chopping and as you lift the blade pieces will stick to it, moving them around to other areas, helping to mix up the colors randomly.

Chop and chop and chop the colors until they are quite small and randomly mixed together.

Form the chips into a pancake shape with your hands. Roll over the pancake to smooth it into a more uniform piece.

Flip the piece over and roll over it from the back as well. Push in from the edges to make sure all the pieces are sticking together and roll the front and the back again. Keep the sheet to a 1/4” thickness.

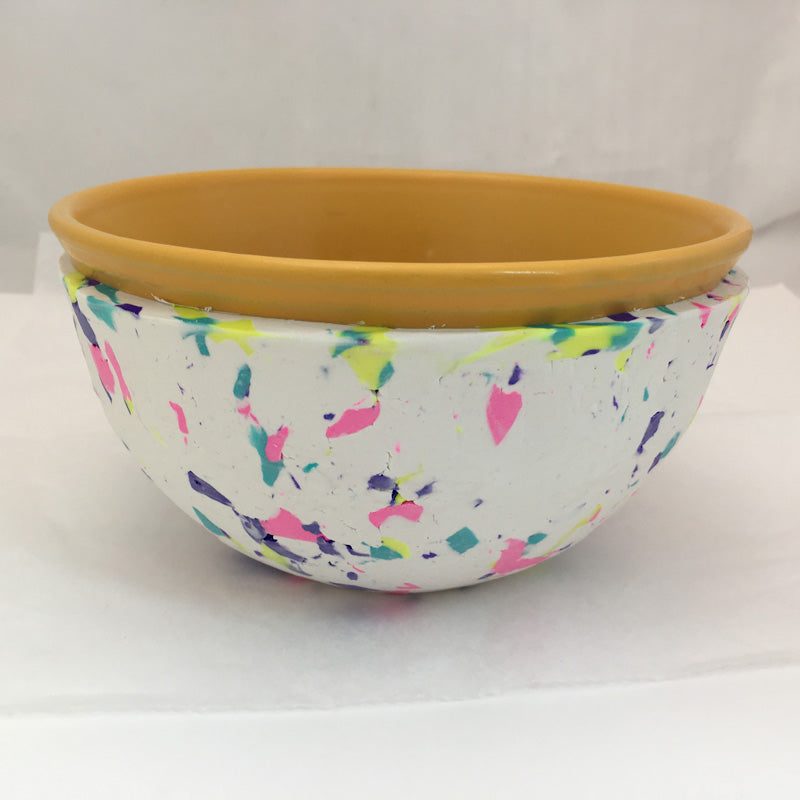
Drape the sheet over the outside of the bowl to make sure it looks like the sheet will be large enough.

Carefully lift the sheet of clay from the bowl. Dust a thin layer of corn starch over the outside of the bowl and especially where the bowl has an unglazed area at the base. Wipe off excess corn starch.

Use the palms of your hands to form the sheet of clay to the shape of the bowl.

It’s okay if there are little cracks and fissures in the clay sheet. But use fingertip pressure to massage larger cracks back together.
Use a flexible tape measure to wrap a straight edge around the top edge of the clay. Trim a neat edge along the tape and remove scrap clay.

If you have an area in the edge where there is a dip, you can use some of the scrap clay to fill it in and then trim again.

Finger buff the cut edge of the clay bowl. Press down on the bowl slightly to flatten the bottom and mark where the foot should go

Turn the bowl upside-down again.

Use the scraps to form a circle. Roll over the circle with the Acrylic Clay Roller to make sure it is all the same thickness.

Use circle cutters to cut a nice clean edge around the inside and the outside of the circle shaped foot.

Press the foot into place on the bottom of the bowl.

Use one of the rubber smoothing tips to smooth the seam between the foot and the bowl. Bake the bowl upside down following the baking instructions in Step 1 above.

Allow the bowl to cool completely and then very carefully work the clay bowl off of the ceramic bowl.

If you want your bowl to be shiny like real terrazzo you can add a glaze. Stir Clear Liquid Sculpey (LS) completely to mixing in any lumps. Use your fingertip to spread a thin layer of Clear LS all over the outside of the bowl. Bake again for 20 minutes at 275 °F to set the Clear LS.

After the Clear LS is set, immediately use a heat gun to bring the temperature of the Clear LS up so that it will become truly clear and shiny. Use caution and keep the heat gun moving so that you don’t burn the Sculpey underneath the Clear LS

Designer’s Note: Oven baked Sculpey is waterproof but being exposed to water over long periods of time can cause the clay to look foggy and faded. Protect the inside of your planter from dirt and water by lining it with a plastic liner. If using your planter outside, it will look best longest if it is protected from strong direct sunlight and brought inside after the growing season.

