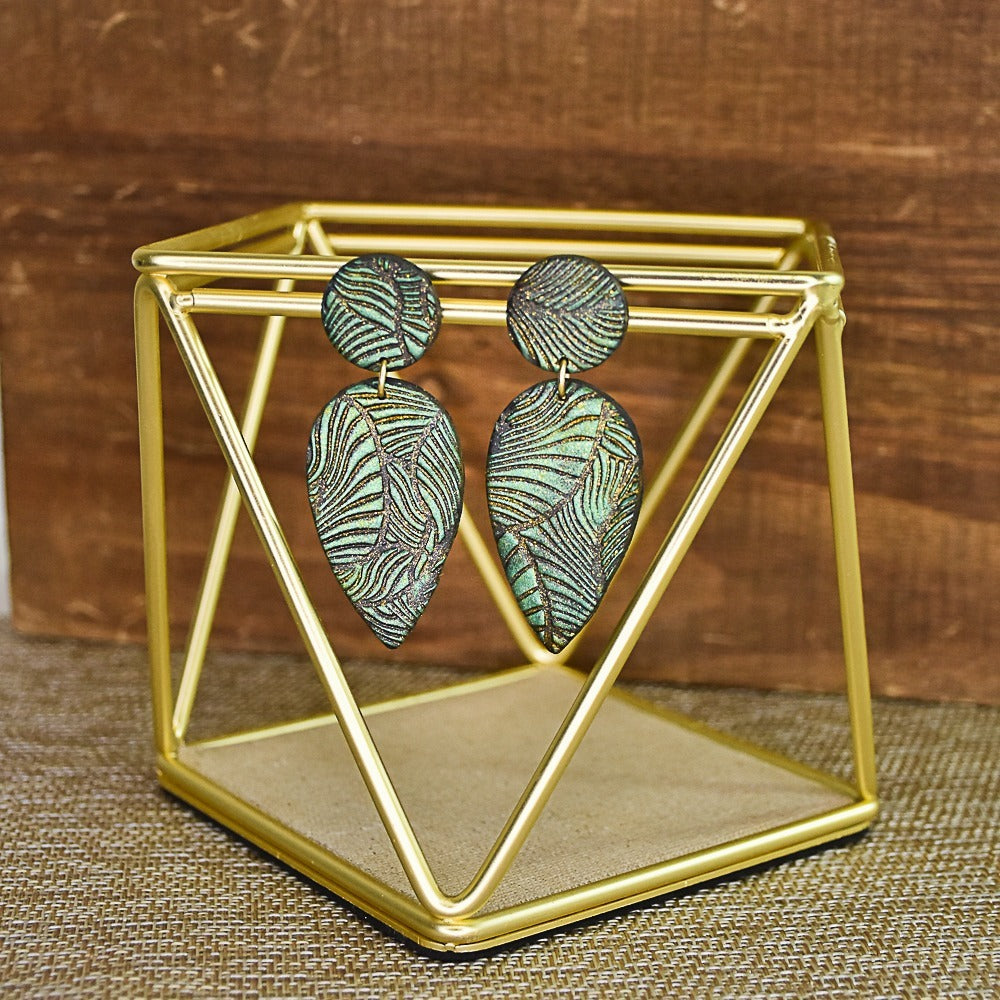
Sculpey Souffle™ Tropical Earrings Featuring Unicorn Spit for Extra Sparkle
Sculpey Souffle™ Tropical Earrings Featuring Unicorn Spit for Extra Sparkle
Designed by Syndee Holt
Read More
Read Less
Sculpey Souffle™ teams up with Pearl Ex and Unicorn Spit to highlight the textures on these earrings. Unicorn Spit adds that extra sparkle to any polymer clay project!
ADDITIONAL SUPPLIES
• Unicorn Spit Gel Stain and Glaze (I’ve used Golden Gosling)
• Small paint brush and wipe or damp cloth
• Green Mica Powder (I’ve used Pearl Ex Spring Green)
• Needle tool or jewelers hand drill
• 7mm gold tone jump rings (2)
• Gold tone post findings (2)
• 2 pair of small jewelry pliers
• Instant glue
• Small spray bottle of water
• Folded baby wipe or paper towel

Project Instructions
- Getting Started:
Start with clean hands, unwrap and knead clay until soft and smooth, or condition by running clay though a Pasta Machine. We recommend using a designated machine for clay purposes only. When working with multiple colors, clean hands with soap and water or baby wipes (we have found that baby wipes work best) before switching colors. Shape clay, pressing pieces firmly together. Wash hands after use.
- Baking:
Sheet out about half a block of the conditioned Poppy Seed clay on the second from widest setting on the clay conditioning machine or roll with the acrylic roller to about 1/8 inch (3mm). Lightly spray the selected texture on the texture sheet with water and place face down on the clay sheet. (NOTE: put a clean piece of paper under the sheet of clay). Firmly press down on the texture sheet or use the acrylic roller to firmly press the texture into the clay. Remove the texture sheet and peel the paper from the textured clay sheet. Use a paper towel or micro fiber towel to lightly pat the texture to help remove the excess water from the texture.

Once the texture is completely dried, press just the tip of your finger into the mica powder and lightly swipe it over the top of the texture surface. NOTE: see how I’m using only the powder in the lid? You only need a tiny amount on your finger each time! Cover the entire textured area.

Use the second from largest (1.75”) of the teardrop cutters to cut out two teardrops. Use the smallest of the circle cutters (.75”) to cut out two circles from the remaining clay for the top of the earrings.

If you want to place the holes in your earrings before baking, position each pair of earrings the way that they will hang and use a large needle tool to press through the clay and create your assembly holes. Place the earrings on a clean sheet of paper on the baking tray and bake according to the directions in Step 1.

Once the pieces have baked and cool the fun really gets rolling! Shake your bottle of Unicorn Spit and squeeze a small amount into a small dish (I use my bottle caps). Gently brush the Unicorn Spit over the surface of the clay. Gently wipe the surface of the clay with a folded baby wipe or folded paper towel. Repeat for each of the four pieces.


If you are using a hand drill to place your holes, you can do so once the Unicorn Spit is dried.

To assemble the earrings, open one of the jump rings with the two pairs of jewelry pliers by lightly twisting at the ring opening. Feed the ring through the top of the teardrop piece and the bottom of the upper round piece before closing the jump ring. Repeat for the other earring.

Turn the earrings over and add a drop of instant glue to the center of the top circles and press the post finding into place. Allow the glue to dry and your earrings all complete!


