Skip to product information
1 of 1

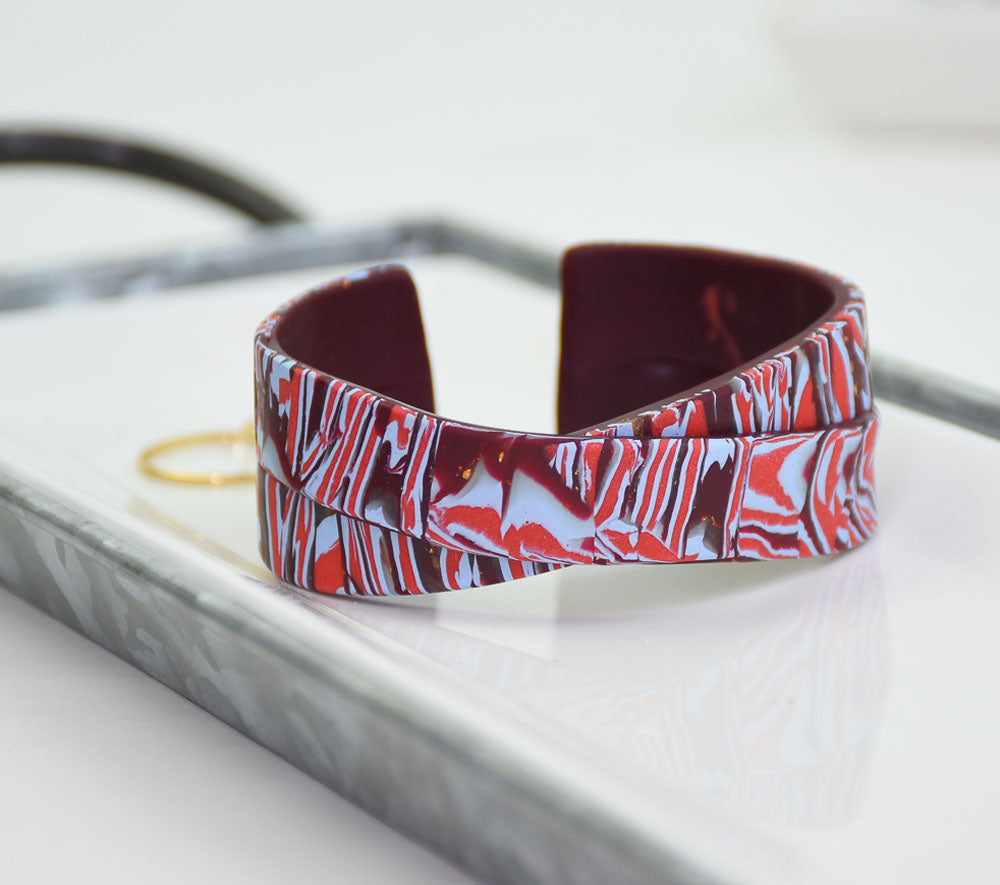
Sculpey Soufflé™ and Premo™ Mokume Gane Criss-Cross Cuff

Sculpey Soufflé™ and Premo™ Mokume Gane Criss-Cross Cuff

Designed by LMedina
Read More
Incredible swirls of color and hints of gold are the star of this gorgeous wrap around bracelet. TIME TO COMPLETION: Make time: 30 mins Bake time: 45 mins
Read Less
ADDITIONAL SUPPLIES
  • Gold Leaf
  • Cardstock
  • Stapler
View full details
Project Instructions

Step 1

Getting Started:

Please make sure your work area is covered and you are not working on an unprotected surface. We recommend working on the Sculpey® Oven-Safe Work Mat, wax paper, metal baking sheet, or disposable foil. Uncured clay may damage unprotected furniture or finished surfaces. Be sure to cover your crafting area appropriately.

Start with clean hands, unwrap and knead clay until soft and smooth, or condition by running clay though a Pasta Machine. We recommend using a designated machine for clay purposes only. When working with multiple colors, clean hands with soap and water or baby wipes (we have found that baby wipes work best) before switching colors. Shape clay, pressing pieces firmly together. Wash hands after use.

Baking (also called Curing):

Begin by preheating oven to 275 °F (130 °C). After you are done creating; for best results bake/cure clay on an oven-proof surface such metal, aluminum foil, an index card or the Sculpey® Clay Mat at 275°F (130 °C) for 30 minutes per 1/4" (6
mm) thickness according to package directions. Oven safe glass or ceramic
surfaces are also acceptable for baking/curing; however please note that the
baking/curing times may take longer as the glass or ceramic surfaces take
longer to heat up. For best baking results, use an oven thermometer. DO NOT USE
MICROWAVE OVEN. DO NOT EXCEED THE ABOVE TEMPERATURE OR RECOMMENDED BAKING TIME.

Step 2

Layer squares of clay, these can be any thickness you like - the thicker colors will be more prominent in your design. I use squares of clay in this order, Premo pale blue, Soufflé Chili Pepper, Premo Pale Blue, and Translucent.

Step 3

Add gold foil over the translucent layer.

Step 4

Add a thin layer of Premo Alizarin Crimson.

Step 5

Here is a side view so you can see the clay thicknesses I used. Soufflé Chili Pepper is the thickest layer because I want that color to be the most noticeable.

Step 6

Cut your square in half and stack.

Step 7

Make indents with clay tools, I used a dotting tool. I pressed some of them all the way through but you can also flip your piece over and repeat this.

Step 8

Press all the sides inward to close up the holes you just made. This will condense your piece into a smaller rectangle. Flip your piece and poke more holes with a different tool.

Step 9

Condense your rectangle again and then cut in half. Flip the halves back to back and push together again.

Step 10

Grab a tool again and make indents in the clay. The more you poke and condense and flip the more intricate your pattern will become. You’ll end up with a unique, organic pattern.

Step 11

Use an acrylic roller to reduce the height of your triangle and close up any gaps. You can alternatively use your fingers for this step.

Step 12

Cut in half again, stack on top of itself.

Step 13

Reduce the rectangle with your fingers.

Step 14

Use an acrylic roller to flatten the patterned side flat.

Step 15

Use a tissue blade to make cuts and rearrange your pieces to create a more intricate pattern.

Step 16

I cut my piece twice and stacked it. Condense the sides again.

Step 17

Keep chopping and rotating until you are happy with your design. You can cut your piece in any direction.

Step 18

Slice a thin piece to check your pattern, your slices may look different the more you cut.

Step 19

Find the slices you like and arrange them on top of the two bands that will wrap around your arm. I used Premo Alizarin Crimson for the bands because they resemble dyed leather. Use enough clay for the bands to be able to trim the edges later and still have about ½ inch across.

Step 20

Use an acrylic roller to adhere the slices onto the bands and even everything out.

Step 21

Use a tissue blade to trim the edges of the bands, crisscross the strands but don’t press them together yet.

Step 22

Build a simple bracelet form using card stock and staple the edges together. Make sure this fits snugly around your wrist so your cuff won’t fall off. 

Step 23

Place the bands onto the form and wrap around. Press the strands together.

Step 24

Trim the ends of the bands with a tissue blade. Ideally, you want to leave a ½ inch to a 1-inch gap between the two ends of the band so the cuff is secure. Bake at 275 degrees for 45 mins.

Artist tip: My cuff is less than ¼ inches thick but baking wearables for 45 mins will increase the flexibility and durability of your piece. I’ve tested baking
lengths and 45 mins is the sweet spot for my oven! It will not burn your clay. You may want to do a test in your oven first before baking your cuff.

Step 25

OPTIONAL: Use Microfinishing Polishing Papers to smooth the edges of your pieces and to achieve a satin finish overall.

Step 26

I had extra clay with this pattern, you might too depending how thin your slices were. Try making some matching earrings or a pendant with the leftovers! Enjoy.