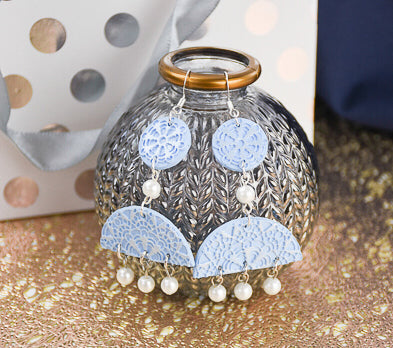
Sculpey Premo™ Pale Blue Ice Crystal Earrings
Sculpey Premo™ Pale Blue Ice Crystal Earrings
Designed by syndee holt
Read More
These earrings are super simple to make with the help of the Sculpey Tools™ Lace Mandala mold and the Circle Cutter Set.
TIME TO COMPLETE: 60 minutes
Read Less
ADDITIONAL SUPPLIES
Have on hand:
- Pearl mica powder (mine is Pearl Ex)
- Small pearl charms (8) mine are Bead Landing Charmalongs (I used two cards of these)
- 6mm silver-toned jump rings (4)
- Silver-toned eye pin (1)
- Silver-toned ear wires(2)
- Needle tool (mine is a Etch n’ Pearl with the tip clipped off)
- Jewelry pliers – two pair make this much easier!
- Small needle nose pliers
- Small paint brush
- Small spray bottle of water
- Couple of sheets of unlined paper

Project Instructions
- Getting Started:
Start with clean hands, unwrap and knead clay until soft and smooth, or condition by running clay though a Pasta Machine. We recommend using a designated machine for clay purposes only. When working with multiple colors, clean hands with soap and water or baby wipes (we have found that baby wipes work best) before switching colors. Shape clay, pressing pieces firmly together. Wash hands after use.
- Baking:
Sheet out about 1/3 of the conditioned Pale Blue Premo on a medium setting on your clay conditioning machine. Lightly spray the Sculpey Mandala Mold with water and place the clay against the mold. Put both the clay and mold inside a sheet of folded paper and put it on a solid untextured floor surface (like concrete or smooth tile).
step on the paper from all four sides.
Gently remove the mold and the clay from the folded paper and you should have a perfect mold! This is way easier than trying to press by hand on the mold, right? Lightly daub away the excess water on the sheet of clay.
Repeat for the other earrings. NOTE: We will also use smaller mandala indicated with the black arrow above.


Select the circle cutter that best fits the mandala and cut out both the large mandala and the small mandala. Isn’t that magic that Sculpey makes circle cutters to fit these?

Lightly touch your fingertip into the lid of the Pearl mica powder and gently swipe across the top of the designs.
Slice the mandala in half and use your needle tool to put 3 matching holes in both halves.
Slice the mandala in half and use your needle tool to put 3 matching holes in both halves.

Lightly apply the mica powder to the two smaller mandalas and place your holes as shown.
Bake your pieces as directed in Step 1 above.
Bake your pieces as directed in Step 1 above.

After the pieces have baked and cooled, apply a thin coat of the Sculpey Gloss Glaze to the TOP of the pieces to protect the mica powder. Allow to dry.

Assemble as shown. NOTE: I removed a pearl from the finding and created my own with a double loop for the center of the earring by threading the pearl onto the eye pin, trimming the pin and creating a second loop with the needle nose pliers.

Here is a look at my completed earrings.

- Choosing a selection results in a full page refresh.
- Opens in a new window.

