Skip to product information
1 of 1

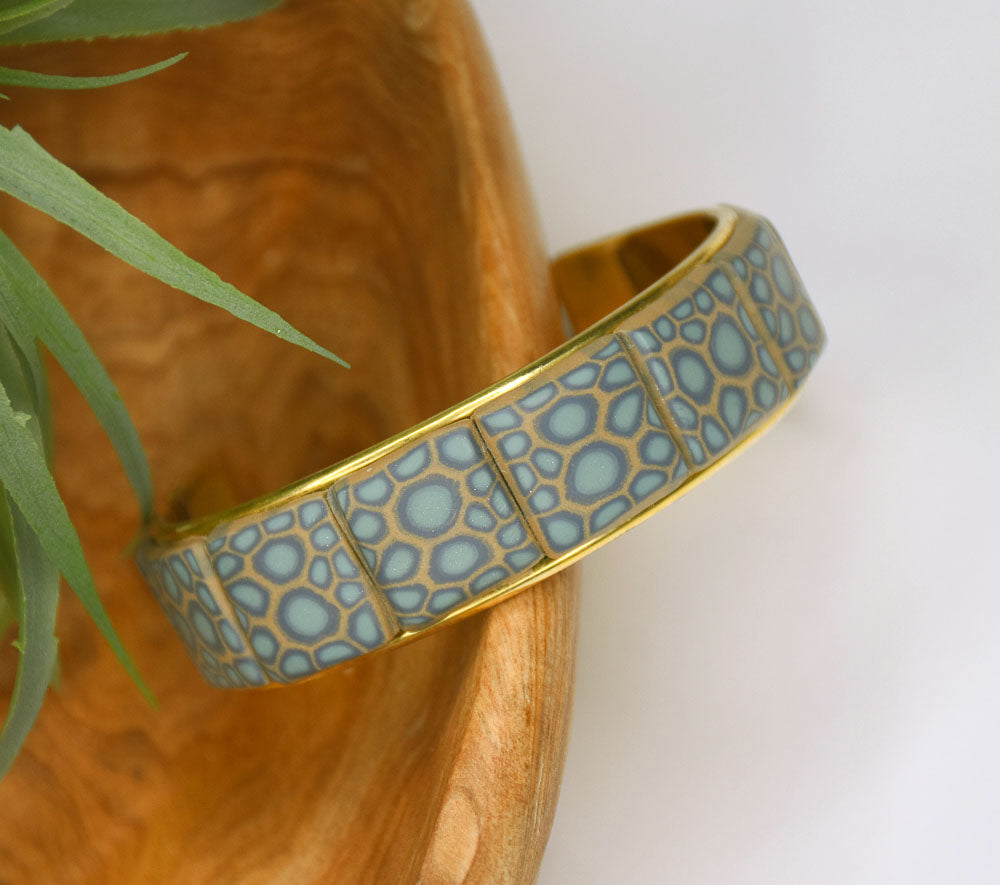
Sculpey Premo™ Faux Petosky Stone Bangle

Sculpey Premo™ Faux Petosky Stone Bangle

Read More
A real Petosky stone is a rock fossil composed of fossilized coral. This project recreates the look of a Petosky stone with a cane building technique. COMPLETION TIME: 60 Minutes to make and bake. Designed by Amy Koranek
Read Less
ADDITIONAL SUPPLIES
  • Metal channel bracelet blank available from Etsy
  • Silicone glue
View full details
Project Instructions

Step 1

Getting Started:

Please make sure your work area is covered and you are not working on an unprotected surface. We recommend working on the Sculpey® Oven-Safe Work Mat, wax paper, metal baking sheet, or disposable foil. Uncured clay may damage unprotected furniture or finished surfaces. Be sure to cover your crafting area appropriately.

Start with clean hands, unwrap and knead clay until soft and smooth, or condition by running clay though a Pasta Machine. We recommend using a designated machine for clay purposes only. When working with multiple colors, clean hands with soap and water or baby wipes (we have found that baby wipes work best) before switching colors. Shape clay, pressing pieces firmly together. Wash hands after use.

Baking (also called Curing):

Begin by preheating
oven to 275 °F (130 °C). After you are done creating; for best results
bake/cure clay on an oven-proof surface such metal, aluminum foil, an index
card or the Sculpey® Clay Mat at 275°F (130 °C) for 30 minutes per 1/4" (6
mm) thickness according to package directions. Oven safe glass or ceramic
surfaces are also acceptable for baking/curing; however please note that the
baking/curing times may take longer as the glass or ceramic surfaces take
longer to heat up. For best baking results, use an oven thermometer. DO NOT USE
MICROWAVE OVEN. DO NOT EXCEED THE ABOVE TEMPERATURE OR RECOMMENDED BAKING TIME.

Step 2

We are going to mimic the look of Petosky stones by making a partially blended cane.
Then we will reduce the cane to multiple sizes to form the surface of the
“stone”.

I used 1/2 block of each color which gave me at least enough cane for two bracelets.
If you like you can start with 1/4 block of each color instead. You can always
make more as needed.

My instructions are using 1/2 block of each color.

Start with a 1/8” thick sheet of each color that is 1/3 as wide as the rollers of the
pasta machine. Slightly overlap the edges of the sheets as shown.

Roll the sheet with the Acrylic Clay Roller to seal the colors together.

Step 3

Fold the sheet in half across the stripes matching like color to like color.

Step 4

Next, press the sheet, fold first, through the pasta machine on the thickest setting.

Repeat folding, always matching like color to like color, and pressing fold first
through the pasta machine. After a few repeats (folding and pressing) you will
notice the colors blending.

Continue this process - folding and pressing- until you have a blend that you like.

Step 5

Use the Needle Tool to score and drag through the colors from one color to the next.

Flip the sheet over. And repeat this step on the back as well.

Step 6

Fold the sheet as before, matching like color to like color. Roll the fold shut with the
Clay Roller.

Step 7

Press the sheet this time through the pasta machine short edge first, so that the
sheet becomes much longer. Do not fold, but press the sheet through the second
thickest setting. Once more, do not fold, and press the sheet through the third
thickest setting.

At this point my sheet is about 15” long.

Step 8

Cut a straight edge along the edge of the Coastal Pearl end.

Roll a little rope of Coastal Pearl. Place the rope on the edge of the sheet.

Step 9

Roll the sheet up tightly around the rope so that the Coastal Pearl is in the middle of
the cane.

Step 10

Keep rolling until the whole sheet is rolled up. You’ve now created a Jelly Roll
Cane.

Step 11

Roll the log or cane on the work surface to smooth it.

Step 12

Score the outside of the cane long ways with the Needle Tool. This will help to move the outside color into the middle color.

Roll the cane again to smooth the outside.

Step 13

Keep rolling the cane to reduce it and to lengthen it.

Once the cane is reduced to a diameter of 3/8”, slice off a 1.25” length.

After removing a piece at this diameter, continue reducing the cane smaller and
smaller in diameter. At each new diameter, section off one or two pieces 1.25”
in length.

Gather several sections of the cane in various diameters into a bundle.

My bundle is about 2” x 1.5”.

Step 14

Push the sides of the cane together to flatten the sides.

Step 15

Keep pushing on the sides, changing the cane to a rectangle shape, and reducing it
in design size.

Step 16

Keep reducing it until it is the same width as the bracelet form.

Prepare the bracelet form by placing a very small amount of silicone glue on the metal form. Make a very thin sheet of clay and lay it on top of the glue.

Step 17

Slice the cane open to reveal the pattern.

Step 18

Slice even slices from the cane about 1/16” thick.

Step 19

Here’s a look at the slices from my cane. Just by turning the slices in different
directions, I get a more random look.

Step 20

Position the cane slices on the clay layered bangle. Smooth the slices as needed with
your fingertips.

Step 21

Bake the bangle following the baking instructions for Sculpey Premo™.

Allow to cool completely before handling.