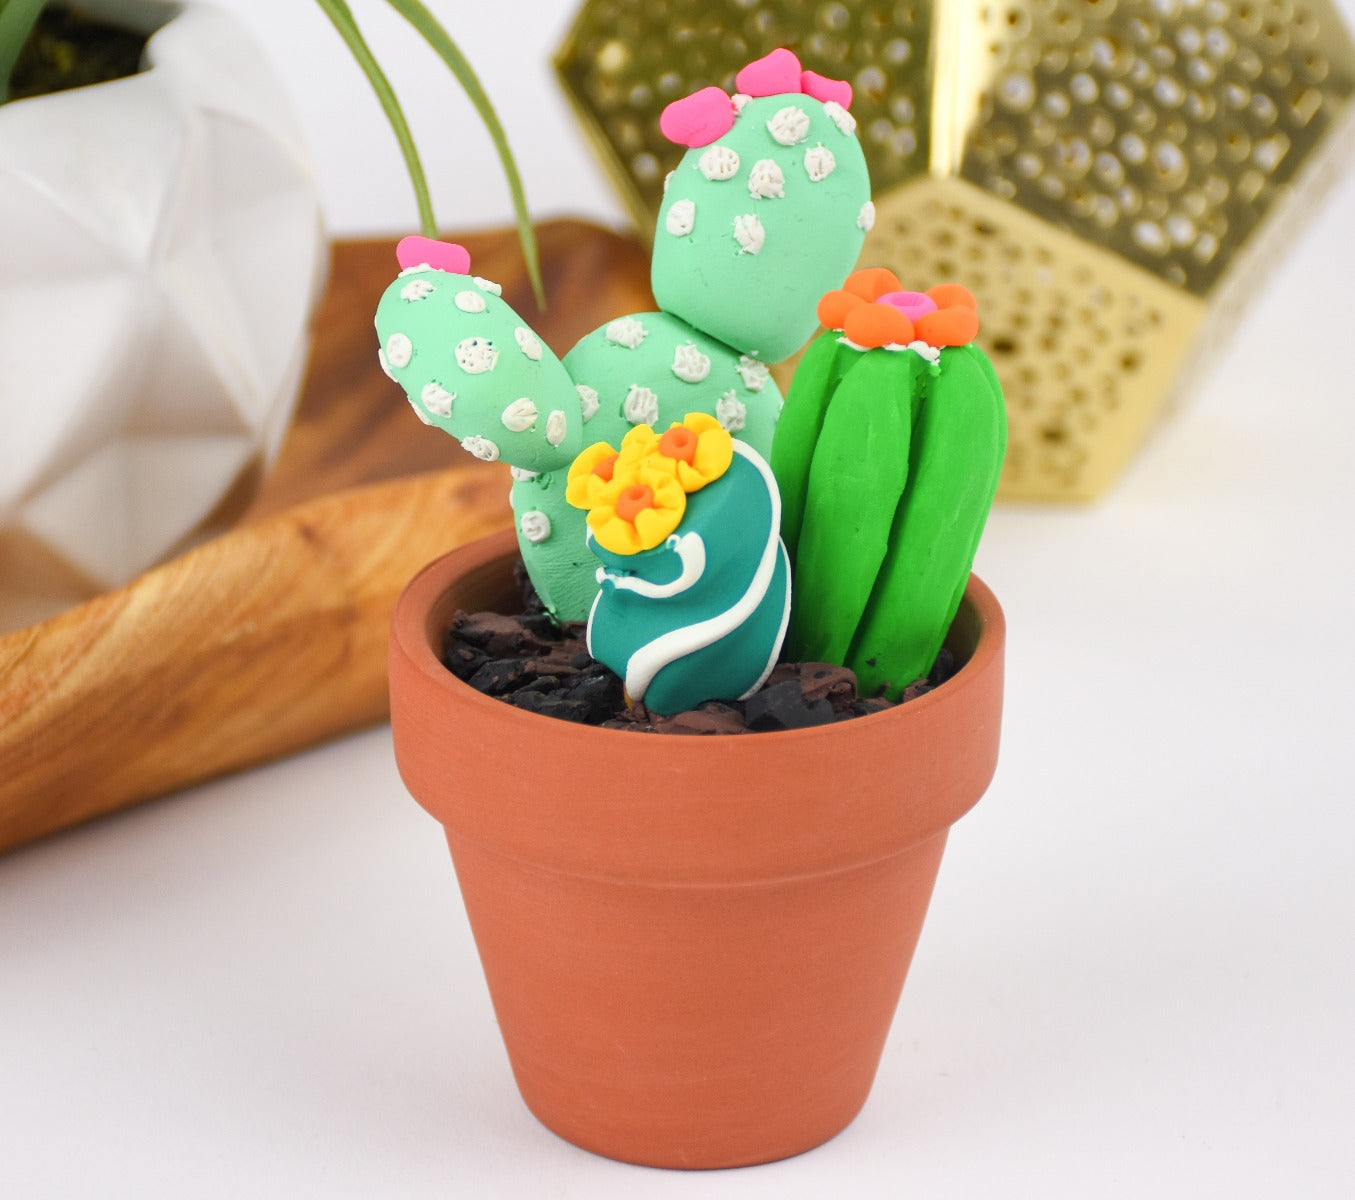
Sculpey Bake Shop® Cactus Collection
Sculpey Bake Shop® Cactus Collection
Designed by Amy Koranek
Read More
Read Less
Little cacti have simple shapes and they are easy to make with Sculpey Bake Shop®. Put them in a real terra cotta pot and you will have instant growing success.
COMPLETION TIME:45 Minutes to make and bake
ADDITIONAL SUPPLIES
- Terra cotta pot 2.5” wide across the top
- Aluminum foil
- Toothpicks

Project Instructions
- Getting Started:
Start with clean hands, unwrap and knead clay until soft and smooth, or condition by running clay though a Pasta Machine. We recommend using a designated machine for clay purposes only. When working with multiple colors, clean hands with soap and water or baby wipes (we have found that baby wipes work best) before switching colors. Shape clay, pressing pieces firmly together. Wash hands after use.
- Baking:
Crumple aluminum foil into the bottom of the terra cotta pot. Leave some extra space at the top for the clay dirt that we will add later.

Mix up the green colors for your cacti-
1/2 of the Green bar + 1/2 of the White bar to make Light Green - Bunny Ears Cactus;
1/4 of the Green bar + 1/2 of the Blue bar to make Aqua - Blue Torch Cactus;
1/4 of the Green bar + 1/2 of the Yellow bar to make Yellow Green - Bottle Cactus.
1/2 of the Green bar + 1/2 of the White bar to make Light Green - Bunny Ears Cactus;
1/4 of the Green bar + 1/2 of the Blue bar to make Aqua - Blue Torch Cactus;
1/4 of the Green bar + 1/2 of the Yellow bar to make Yellow Green - Bottle Cactus.

For the Bunny Ears Cactus, divide the Light Green clay into one large piece and two smaller pieces.

Make thick pancakes as shown.

Add tiny White dots all over the Bunny Ears.

Poke toothpicks into the foil and allow them to stick up so the cactus can be positioned on them. Push the Bunny Ear cactus onto one of the toothpicks and slide it all the way down to the foil. Add a half toothpick out of the Bunny Ear cactus.

Push the third ear onto the cactus so that it connects to the body. You can use toothpicks in this way to help support pieces that stick out and are unable to support themselves.

From the Yellow Green clay, make a thick club shape. Score the cactus with the poker tool.

Pinch the areas between the score lines with your fingertips to help open the spaces and to smooth the clay.

Push the Bottle Cactus into place over a toothpick in your pot.

Next, it will be easiest if we fill in some of the area around the base of the cacti with our clay soil.
Chop up 1/4 bar of Black and 1/4 bar of Brown with the knife tool.
Chop up 1/4 bar of Black and 1/4 bar of Brown with the knife tool.

Keep chopping so the bits get smaller and smaller and kind of look like dirt.

Sprinkle the dirt around the base of the cacti and all around the edges of the pot. Use one of your tools to tamp the dirt into place so the little chunks stick together.

Finally let’s make a Blue Torch Cactus. From the Aqua clay make a thick log that is kind of square in shape.

Add thin White lines along the edges of the log. Blue Torch Cacti don’t really have these stripes, but it looks fun and adds detail. And since there are more than 2000 types of cacti, I think we can make ours look as fun as we want and still look kind of realistic.

Grab the ends of the shape and twist it for fun.

Push the Blue Torch Cactus down onto the remaining toothpick.
Use the Ball Tool to push a divot in the end of the Bottle Cactus. Add some White here and score it with the Poker Tool or a toothpick. Also prick little details in the White spots on the Bunny Ear Cactus. At this point I thought my Blue Torch Cactus was way too tall so I cut it in half with my Knife Tool.

Add three balls of Yellow to the end of the Blue Torch.

Make crisscross lines on each ball with the Flat Spade Tool.

Poke a hole in each of the Yellow flowers.

Add Orange petals to the Bottle Cactus.

To add flowers to the Bunny Ear Cactus, you will need to make some holes with the Poker Tool to insert the flowers into.

Fill the holes with Pink clay balls to make flowers.

Add centers to the flowers with different colors of clay. Bake the whole arrangement following the baking instructions for Sculpey Bake Shop®. Allow to cool completely before handling.

- Choosing a selection results in a full page refresh.
- Opens in a new window.

