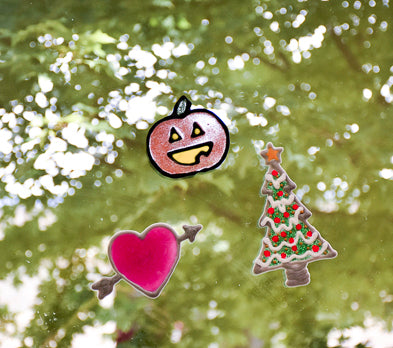
Liquid Sculpey® Jack-O-Lantern Window Cling
Liquid Sculpey® Jack-O-Lantern Window Cling
Designed by Amy Koranek
Read More
Read Less
You can use Liquid Sculpey® to design your own window stickers for all your holiday celebrations.
TIME TO COMPLETE:1 Hour to make and bake (two bakings)
ADDITIONAL SUPPLIES
- Knitting needle or skewer
- Paper towel
- Silicone baking cups (2)
- Orange glitter
- Green glitter

Project Instructions
- Getting Started with Liquid Sculpey:
- Baking:
Draw or print out paper templates of your favorite holiday icons. Or you can print the PDF included with this instruction.
Place a piece of glass over the icon that you would like to trace. I remove glass from old photo frames and wrap masking tape around the edges to make a re-usable work surface for making window clings. Glass is super smooth and non-porous so that when you apply Liquid Sculpey® (LS) to it, you create a super smooth backing that will cling to windows and mirrors.
Place a piece of glass over the icon that you would like to trace. I remove glass from old photo frames and wrap masking tape around the edges to make a re-usable work surface for making window clings. Glass is super smooth and non-porous so that when you apply Liquid Sculpey® (LS) to it, you create a super smooth backing that will cling to windows and mirrors.

Trace the inside lines first.

Next trace the outside lines. When the outlines are all done, bake the glass following the baking instructions for LS. Allow the glass to cool completely after baking.

While the outline is baking you can prepare the Clear LS for the colored areas. Clear LS has a sediment in the bottom that must be stirred back into the liquid so that it goes completely clear when baked. I use a knitting needle to reach all the way to the bottom of the bottle so that the sediment can be worked back in. Clean your tool by wiping with paper towel.

Squirt a dime sized amount in the bottom of one of the baking cups. Squirt a quarter sized amount in the second baking cup. I like to use silicone baking cups for mixing colors of LS. After each project, I use up as much of the left over colors as I possibly can, even filling and baking silicone molds with left over colors for future projects. Then the silicone cups can be baked and the LS residue can be peeled out for easy cleaning.

Tint the smaller amount of LS with green glitter. Tint the larger amount of LS with orange glitter. You can add as much glitter as you like to deepen the color.

Stir the glitter into the LS completely using a tool from the Clay Tool Starter Set. Wipe tools clean with paper towel.

Gently flex the silicone cup with the orange tint to carefully pour into the pumpkin areas.

The pre-baked Black LS lines will keep the orange tinted LS from running all over.

Pour the green tinted LS into the stem. Add Yellow LS to the eyes and mouth areas. You can use the needle tool to help drag the Yellow into very small areas.

Bake the pumpkin on the glass one more time following the baking instructions for LS.

When the glass is completely cool, carefully peel the pumpkin cling away with your fingers. Apply to clean dry glass for decorating. Store wrapped flat in kitchen clear wrap when not in use.

You can make clings for all seasons and celebrations!


