
Sculpey Premo™ Chunky Rings
Sculpey Premo™ Chunky Rings
Designed by Amy Koranek
Read More
Create a wardrobe of rings in an afternoon using your favorite Sculpey Premo™ colors and a metal circle cutter that fits your finger!
COMPLETION TIME:
60 Minutes to make and bake
Read Less
ADDITIONAL SUPPLIES
- Metal circle cutter in a diameter that fits your finger
- Cellophane tape
- Heat set crystals in clear, pink, and purple
Project Instructions
- Getting Started:
Start with clean hands, unwrap and knead clay until soft and smooth, or condition by running clay though a Pasta Machine. We recommend using a designated machine for clay purposes only. When working with multiple colors, clean hands with soap and water or baby wipes (we have found that baby wipes work best) before switching colors. Shape clay, pressing pieces firmly together. Wash hands after use.
- Baking:
To Make the Signet Ring:
A metal circle cutter can make a good form for making clay rings. Try the circle cutter on for size first. If you do not have a circle cutter that fits your finger, you can make a form out of card stock. After making the form, wrap it in cellophane tape so that the clay will be easily removed after baking.
To prepare your metal ring form, wrap cellophane tape around the outside of the metal circle cutter. I avoided placing the tape over the safety rim on the cutter and allowed the tape to extend past the end of the cutting edge. Placing tape on the cutter helps the clay to release more easily after baking.

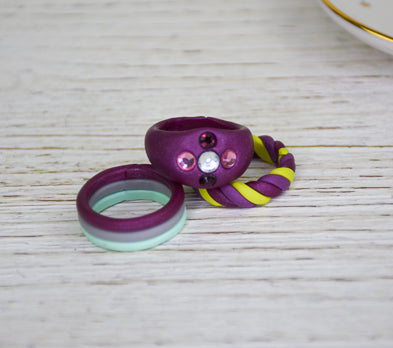
Shape a little log like this one from Blackberry Premo™. The log should be fatter in the middle and tapered toward each end. It should be long enough to wrap around the cutter one time.

Press the log onto the cutter. Flatten out the thicker part to make a focal point for the ring.

Wrap the ends around the cutter and make sure they butt together at the back of the ring. Blend the seam with your fingertips.

Carefully embed heat set crystals as shown. Make sure they are well seated so that they will bond with the clay during baking.

To Make the Twist Ring:
Mix Blackberry Pearl and Concrete 1:1 to make Blackberry Concrete. Hand roll very thin ropes of Wasabi, Blackberry Pearl, and Blackberry Concrete.
Mix Blackberry Pearl and Concrete 1:1 to make Blackberry Concrete. Hand roll very thin ropes of Wasabi, Blackberry Pearl, and Blackberry Concrete.

Bundle the little ropes together as shown.

Twist the little ropes together to create stripes.

Cut a lead end at an angle following the stripes.

Wrap the little rope around a cutter lined with tape. Cut the tail end of the rope to match the angle of the stripes and butt it to the lead end on the cutter. Make sure the ends are connected well.

To Make the Striped Ring:
Roll tiny ropes of Mint, Concrete, and Blackberry Pearl. Lay the ropes sides touching and push them together carefully so they stick to each other.
Roll tiny ropes of Mint, Concrete, and Blackberry Pearl. Lay the ropes sides touching and push them together carefully so they stick to each other.
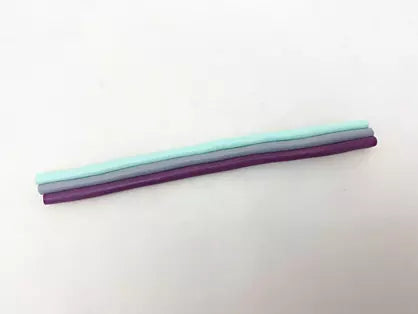
Make an angled cut along one of the short ends and press this cut to a tape lined cutter.
Wrap the ropes around the cutter and cut another angled cut on the tail end to match the first one. Smooth the seams together with your fingers.

Bake the rings following the baking instructions for Sculpey Premo™. Allow the rings to cool completely before removing them from the forms.
When the rings are completely cool, lay the forms down on the work surface with the rim side facing upward. Use your fingernails to press directly down toward the cutting side of the form. This should easily release the clay from the tape.
When the rings are completely cool, lay the forms down on the work surface with the rim side facing upward. Use your fingernails to press directly down toward the cutting side of the form. This should easily release the clay from the tape.

Model your cool rings!
