
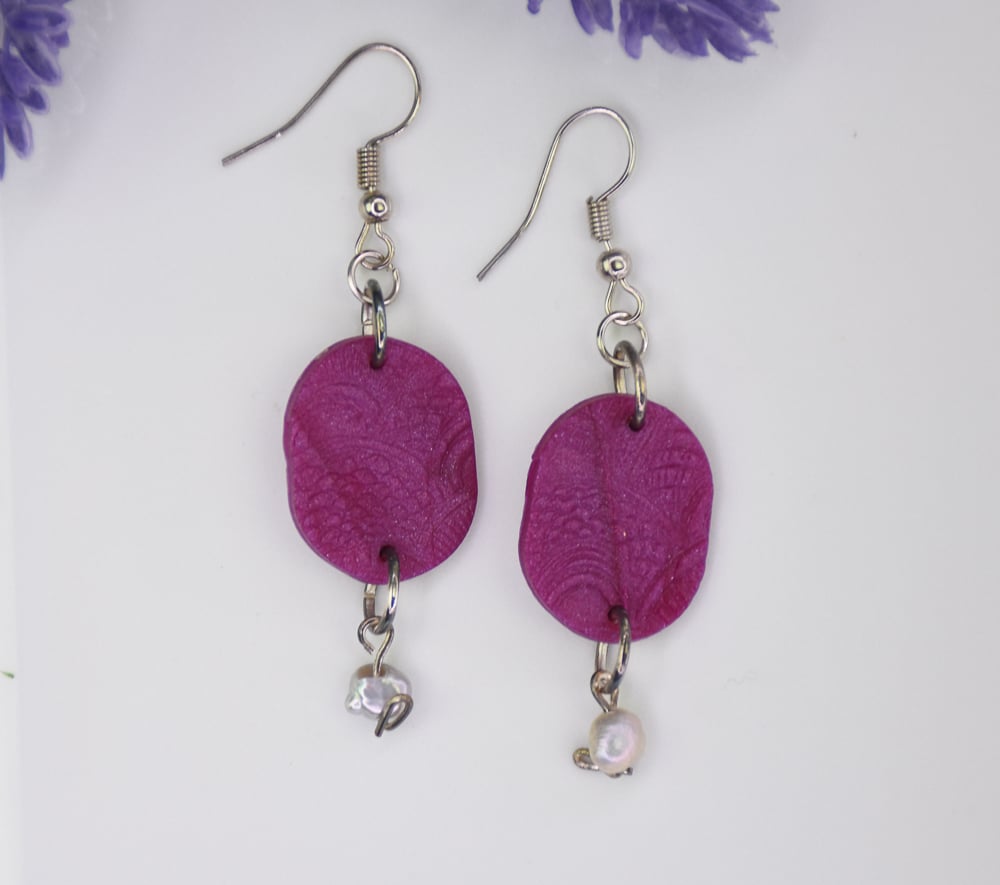
Sculpey Premo™ Blackberry Pearl Coin Dangle Earrings
Sculpey Premo™ Blackberry Pearl Coin Dangle Earrings
Designed by Khyrstyne Dunaway
Read More
Sculpey Premo™ Blackberry Pearl coin-style earrings are some of the easiest earrings to make! They require minimal tools, and it is a fun, quick project. Perfect for a last-minute gift! You will love the pearl effect paired with a texture that makes it pop.
TIME TO COMPLETION:
30 minutes to make 30 minutes to bake
Read Less
ADDITIONAL SUPPLIES
- Pearl bead
- Toothpick
- Fish hook earrings
- 4 jump rings
- 2 eye pins
- Texture sheet or stamp of your choice
Project Instructions
Step 1
- Getting Started:
Start with clean hands, unwrap and knead clay until soft and smooth, or condition by running clay though a Pasta Machine. We recommend using a designated machine for clay purposes only. When working with multiple colors, clean hands with soap and water or baby wipes (we have found that baby wipes work best) before switching colors. Shape clay, pressing pieces firmly together. Wash hands after use.
- Baking:
Step 2
Take your Premo Blackberry Pearl clay out of the package and roll it into a ball.Warm it up in your hands thoroughly in order to make it soft and ready to feed into a clay machine.
Flatten it out on your clay mat and use an acrylic rolling pin to work the clay and warm it up.
Next, run the warmed up and semi flat clay through the pasta machine. You will want the pasta machine on setting 3 for a semi thick, durable earring.

Step 3
Place your texture sheet face down on your clay, pressing it into the clay firmly with your acrylic roller. Carefully remove the texture sheet. NOTE: You can spray the texture sheet with a light spray of water to help prevent any sticking to the clay.
Step 4
You will now take a small oval clay cutter and cut 2 oval clay pieces out of your textured clay. I recommend either the 1.25 inch or 1.5 inch oval (you can make yours any size you wish!) from the Sculpey Tools Nested Oval Cutters.Take your toothpick and poke 2 holes in each small oval piece. You should have one hole at the top and one hole at the bottom of each piece.
You are ready to now bake your clay. Bake your pieces according to the instructions provided in Step 1 above and allow 15 minutes to cool.

Step 5
You will now take 2 eye pins and 2 small pearl beads and slide them on. Connect your eye pin to your oval clay piece by using 1 jump ring. Repeat with the other clay piece as well.
Step 6
Take your earring findings and connect them to the top of the clay pieces by using 1 jump ring. Do the same with the other clay piece. You are all done!
Step 7
Here’s the big reveal for the final earrings!