Skip to product information
1 of 1

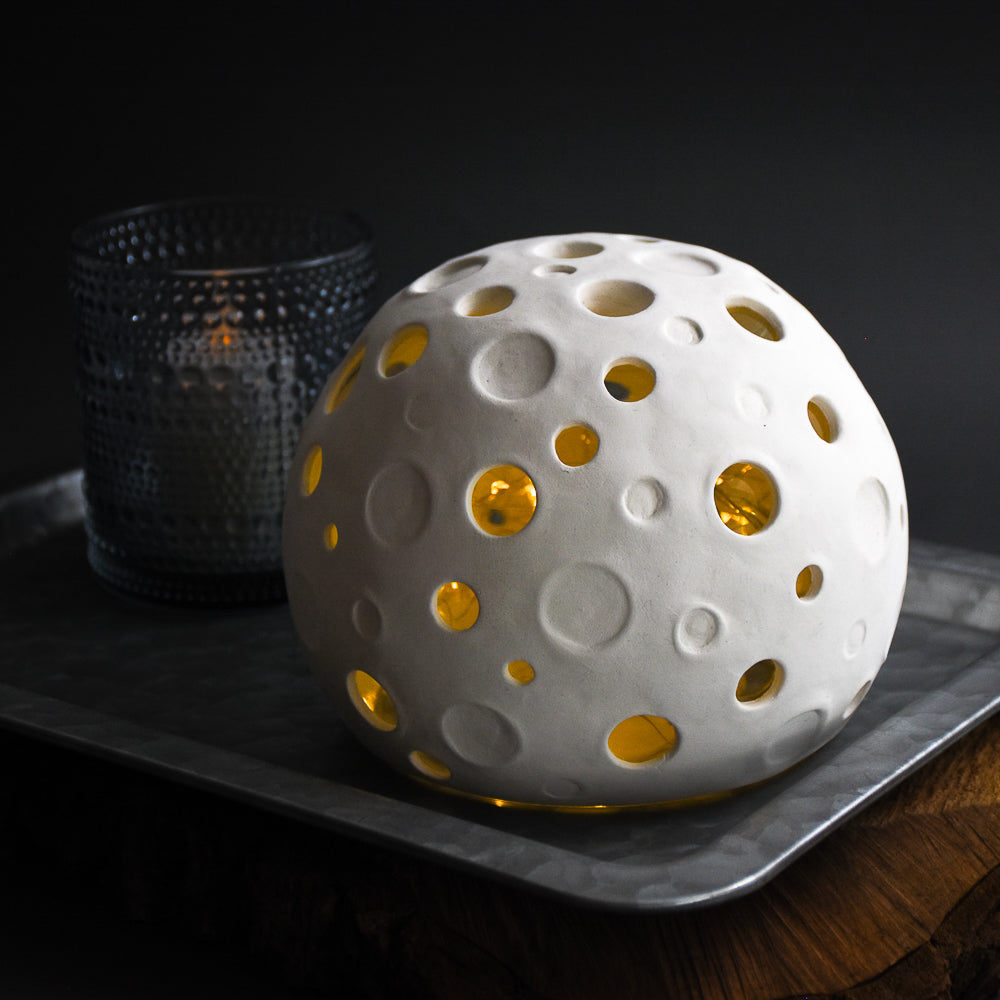
Sculpey Air-Dry™ Moonbeam Tealight Holder

Sculpey Air-Dry™ Moonbeam Tealight Holder

Designed by Linda Hollander
Read More
Wow your friends with this cool glowing moonscape sculpture. These make great gifts as well! TIME TO COMPLETION: 3 hours work over 3-day period of drying time
Read Less
ADDITIONAL SUPPLIES
  • 4” rose bowl or bubble bowl from a craft store
  • Battery operated tea light or fairy lights
  • Wooden dowels ¼”, ¾”
  • Flat paint brush: small 
  • Needle tool or toothpick
  • Craft knife
  • Cotton swabs
  • Emery board
  • Fine grit sanding pad
  • Rubbing alcohol
View full details
Project Instructions

Step 1

Getting Started with Sculpey Air-Dry™:

Please make sure your work area is covered. We recommend working on the Sculpey® Oven-Safe Work Mat, wax paper, or disposable foil.

Start with clean hands, unwrap the amount you think you will use and knead clay until soft and smooth.  Wash hands after use. Wrap any extra clay in then wrapper and then put in an airtight container.

While your Sculpey Air-Dry™ creations will dry on their own, you can also cure more quickly by baking them in your home oven at 200 °F.  The baking
duration depends on your clays thickness-thin pieces should bake for a minimum
of 20 minutes, while thick pieces should bake long with frequent checks for
hardness.

Tips from the Artist:

  • Use water on your fingertips or clay roller to help smooth the clay
  • Then rolling clay sheets, use the blade to lift the sheet and turn over after each roll to prevent the clay from sticking tightly to your work surface.
  • Use water to dampen dry clay areas before applying more clay. A dab of craft glue can also be used to help adhesion.
  • To speed up drying time, place the project in a sunny window or next to a warm heat vent.

Step 2

Use the blade to cut off a piece of clay off the brick then roll into a 1 ½” ball. Use
the roller to roll into a sheet to cover the flat bottom area of the bowl.
Center the clay sheet and press onto bowl from center out toward edges to press
out air and avoid bubbles. Use finger pressure to bevel the edges of the clay.

Step 3

While Step 2 is still wet, repeat it, adding another layer of clay to round out the
flatness.

Step 4

Craters and Windows:

Wet the end of the dowel and press into wet clay then twist several
times in one direction. Pull the dowel straight out. Use a wet paint brush to
smooth clay if necessary. Press cutters into wet clay and twist. Pull the
cutter straight out. If the cut clay does not come out with the cutter use a
toothpick or needle tool to carefully lift the cut clay out. Set aside to dry
overnight.

Step 5

Roll a 2” ball of clay into a sheet and apply to the side of the bowl butting the
top edge along the dried clay edge. Press firmly from top down to make good
contact with the bowl and to avoid air bubbles. Use a little water and finger
pressure to smooth the seam. Use a craft knife to trim excess clay as needed.

Step 6

Create craters and windows as in Step 3. Set aside to dry overnight.

Step 7

Repeat step 4 and 5 until the entire bowl is covered with clay. When thoroughly dry, use the tip of the craft knife or a needle tool to clean up the windows as needed. Use the emery board to sand very rough areas as needed. Use fine grit sanding pad to do a final all-over sanding. Remove sanding dust. Use rubbing alcohol and cotton swabs to clean windows.

Step 8

Insert tea light or fairy lights.