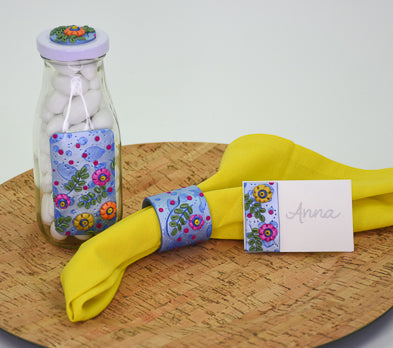
Sculpey Premo™ Floral Slab Place Card
Sculpey Premo™ Floral Slab Place Card
Designed by syndee holt
Read More
This is the third part in a three-part series. The Floral Slab in this tutorial is constructed in detail and then used to create DIY home decor items. Color selection and mixing will be discussed to show how to make a family of colors. We will also see how easy it is to really pack the details into the design - that’s what makes slab making so special and fun - all those glorious details!
COMPLETION TIME:
45 Minutes to make and bake
Read Less
ADDITIONAL SUPPLIES
- 4” x 3” Card stock folded to 3” x 2”
- White craft glue
- Silver permanent marker


Project Instructions
- Getting Started:
Start with clean hands, unwrap and knead clay until soft and smooth, or condition by running clay though a Pasta Machine. We recommend using a designated machine for clay purposes only. When working with multiple colors, clean hands with soap and water or baby wipes (we have found that baby wipes work best) before switching colors. Shape clay, pressing pieces firmly together. Wash hands after use.
- Baking:
Follow Steps 2-20 in the Floral Slab Napkin Ring tutorial https://www.sculpey.com/how-to/sculpey-premo-floral-slab-napkin-ring to create the Floral Slab.

Use the Knife Tool to cut out around a shape to be featured on your place card. You can go with a free style shape as shown.

Or you might want to make a geometric panel for the place card design.
Bake the clay pieces flat following the baking instructions for Sculpey Premo™. Allow the pieces to cool flat before gluing onto the place cards. Add a name to the card with silver permanent marker.
Bake the clay pieces flat following the baking instructions for Sculpey Premo™. Allow the pieces to cool flat before gluing onto the place cards. Add a name to the card with silver permanent marker.


