Skip to product information
1 of 1

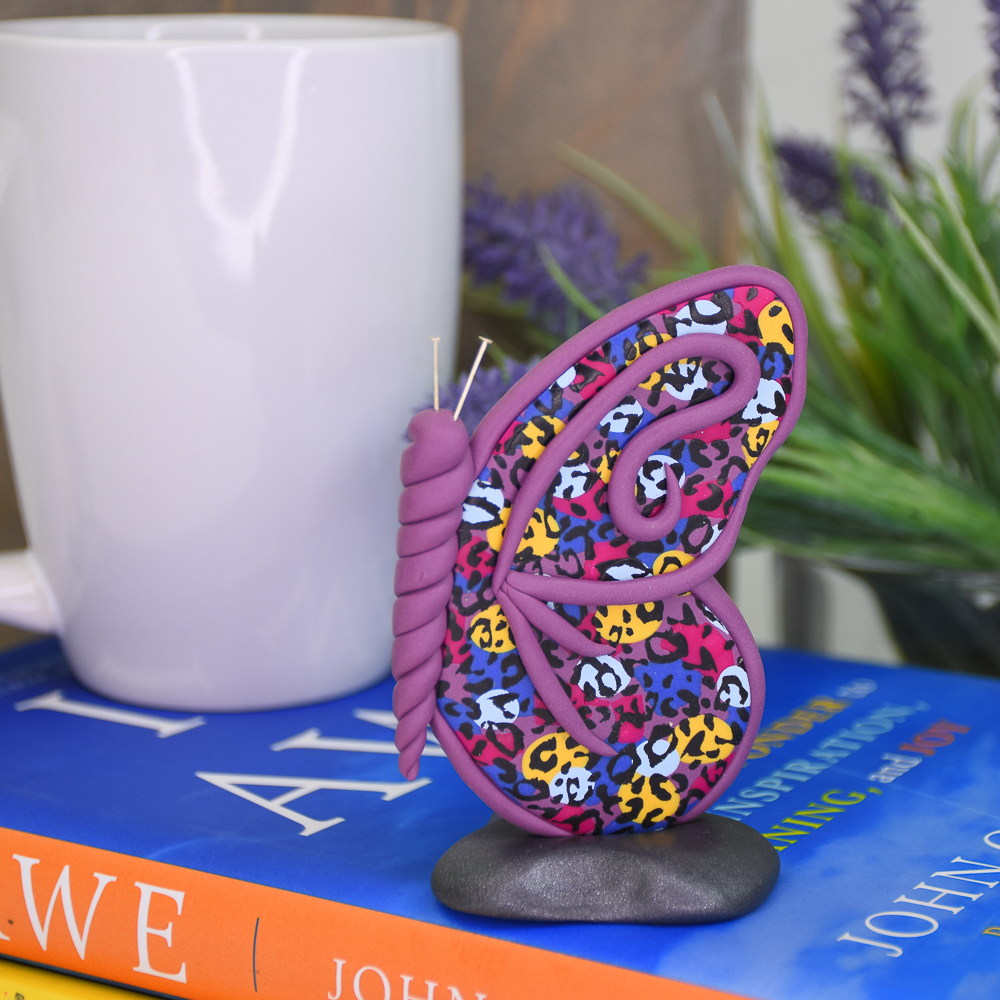
Sculpey Soufflé™ Butterfly Sculpture

Sculpey Soufflé™ Butterfly Sculpture

Designed by Amy Koranek
Read More
Add this elegant butterfly to your table top or indoor garden. Make two for bookends! And don't forget that BFF or special family member. TIME TO COMPLETION: 90 Minutes to make, bake, and assemble
Read Less
ADDITIONAL SUPPLIES
  • 3”-4” Butterfly wing pattern
  • Cheetah or animal print silk screen
  • Black glossy acrylic paint
  • Squeegee or old credit card or old hotel swipe card
  • Shallow tray for water
  • Xacto style sharp craft knife
  • 1” Silver tone head pins (2)
  • 10 mm Jump ring
  • Silicone glue or instant drying glue
View full details
Project Instructions

Step 1

Getting Started:

Please make sure your work area is covered and you are not
working on an unprotected surface. We recommend working on the Sculpey®
Oven-Safe Work Mat, wax paper, metal baking sheet, or disposable foil. Uncured
clay may damage unprotected furniture or finished surfaces. Be sure to cover
your crafting area appropriately.

Start with clean hands, unwrap and knead clay until soft and
smooth, or condition by running clay though a Pasta Machine. We recommend using
a designated machine for clay purposes only. When working with multiple colors,
clean hands with soap and water or baby wipes (we have found that baby wipes
work best) before switching colors. Shape clay, pressing pieces firmly
together. Wash hands after use.

Baking (also called Curing):

Begin by preheating oven to 275 °F (130 °C). After you are
done creating; for best results bake/cure clay on an oven-proof surface such
metal, aluminum foil, an index card or the Sculpey® Clay Mat at 275°F (130 °C)
for 30 minutes per 1/4" (6 mm) thickness according to package directions.
Oven safe glass or ceramic surfaces are also acceptable for baking/curing;
however please note that the baking/curing times may take longer as the glass
or ceramic surfaces take longer to heat up. For best baking results, use an
oven thermometer.

DO NOT USE MICROWAVE OVEN. DO NOT EXCEED THE ABOVE
TEMPERATURE OR RECOMMENDED BAKING TIME.

Step 2

Print a butterfly wing on printer paper. You can easily
download your favorite butterfly shaped wing from the internet.

Roll 1/2 bar Smoky Mauve to a sheet 1/8” thick. Make sure the
sheet is large enough to accommodate the butterfly template.

Step 3

Shave thin pieces of Cornflower with the Clay Blade. Smash the bits to the Smoky Mauve sheet. Keeping the bits of each color consistent in size and shape (in each individual color) gives a more overall consistent pattern. Roll over it when they are all applied to level them to the surface.

Step 4

Repeat Step 3 with shaved pieces of Fuchsia.

Step 5

Roll a log of Yellow Ochre and slice very thin pieces from it so that these pieces are more round in shape. Roll over it when they are applied to level them to the surface.

Step 6

Finally add smaller dots of Pale Blue to the design. Roll to level.

Step 7

Burnish the silk screen to the clay. Have a shallow tray of water nearby to soak the silk screen in after use.

Step 8

Lay a bead of glossy black acrylic paint across the top of the silk screen. It’s not necessary to use glossy paint but I like the way the gloss stands out from the matte background.

Step 9

Squeegee the paint through the silk screen with a squeegee or old credit card or old hotel swipe card.

Step 10

Do not allow the paint to dry on the screen. Carefully peel the silk screen back from a corner.

Step 11

Immediately submerge the screen and the squeegee in water until you have time to clean them up.

Allow the paint to dry on the clay before proceeding.

Step 12

After the paint is dry on the clay, cut out the wing shape using your template and a sharp craft knife.

Step 13

Use the Clay Blade to remove a straight line of clay where the wings meet. This will be where the butterfly body connects.

Step 14

Sheet more Smoky Mauve to make another wing shape 1/8” thick.

Cut out the wing shape.

Impress the jump ring half on and half off of the bottom of the wing.

Step 15

Sandwich the jump ring between the colorful wing and the solid wing.

Step 16

Roll ropes of Smoky Mauve that are as thick as the double wing. Outline the outside edges of the butterfly wing with ropes of Smoky Mauve, stopping and starting on either side of the jump ring with flat areas in the rope.

Step 17

Make more ropes and outline all the way around the wing.
Decorate the surface of the wing with more ropes in swirls. Leave the area
where the jump ring is and where the body will go without ropes.

Step 18

Shape a rope of Smoky Mauve that is double the length of the body area. Taper both ends of this rope.

Step 19

Fold the rope in half on itself with the tapers matching.

Step 20

Twist the two sides to form a tapered rope.

Step 21

Press the twisted taper to the wing to form the body.

Push two 1” head pins into the body for antennas.

Bake the wings and body following the baking instructions for Sculpey Soufflé™.

Allow to cool completely before handling.

Step 22

While the butterfly bakes you can make the stand.

From 1/4 bar Graphite make an organic shape that is thick. The shape needs to be wide enough and thick enough to support the wings. You can see in this photo that my shape is about 1/4” thick and about as wide as the wings in one direction.

Step 23

Push the bottom of the baked wings and the jump ring into the clay base making an impression. Remove the wings and bake the stand alone following the baking instructions for Sculpey Premo™.

Step 24

Allow the base to cool completely. Then glue the jump ring and wings into the pre-made groove with silicone glue or instant drying glue. Allow glue to cure completely before handling.