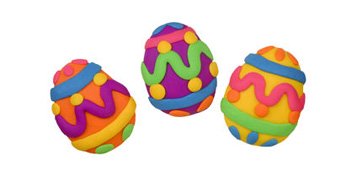
Bake Shop® Eraser Clay Eggs
Bake Shop® Eraser Clay Eggs
Read More
A fun project for kids to make their own egg shaped erasers that really work.
Read Less
ADDITIONAL SUPPLIES
- Toothpick
- Pencil

Project Instructions
- Getting Started:
Start with clean hands, unwrap and knead clay until soft and smooth, or condition by running clay though a Pasta Machine. We recommend using a designated machine for clay purposes only. When working with multiple colors, clean hands with soap and water or baby wipes (we have found that baby wipes work best) before switching colors. Shape clay, pressing pieces firmly together. Wash hands after use.
- Baking:
From Purple, Orange, and Yellow, remove 1/4 of each bar and set these aside. Shape the remaining large pieces of Purple, Orange, and Yellow into teardrops. Flatten the teardrops.
Decorate the Purple egg with a Lime wavy coil in the middle. Add a Pink stripe across the top and a Blue stripe across the bottom. Add Blue teardrops at the top of the egg and Orange teardrops at the bottom of the egg. Add Yellow dots on either side of the Lime coil.
Decorate the Orange egg with a Purple wavy coil in the middle. Add a Blue stripe across the top and a Yellow stripe across the bottom. Add Pink teardrops at the top of the egg and Green teardrops at the bottom of the egg. Add Yellow dots on either side of the Purple coil.
Decorate the Yellow egg with a Pink wavy coil in the middle. Add a Blue stripe across the top and a Lime stripe across the bottom. Add Orange teardrops at the top of the egg and Blue teardrops at the bottom of the egg. Add Orange dots on either side of the Pink coil.
Bake the eraser eggs as directed above in Step 1. Only handle the eraser eggs when they are completely cool.

