
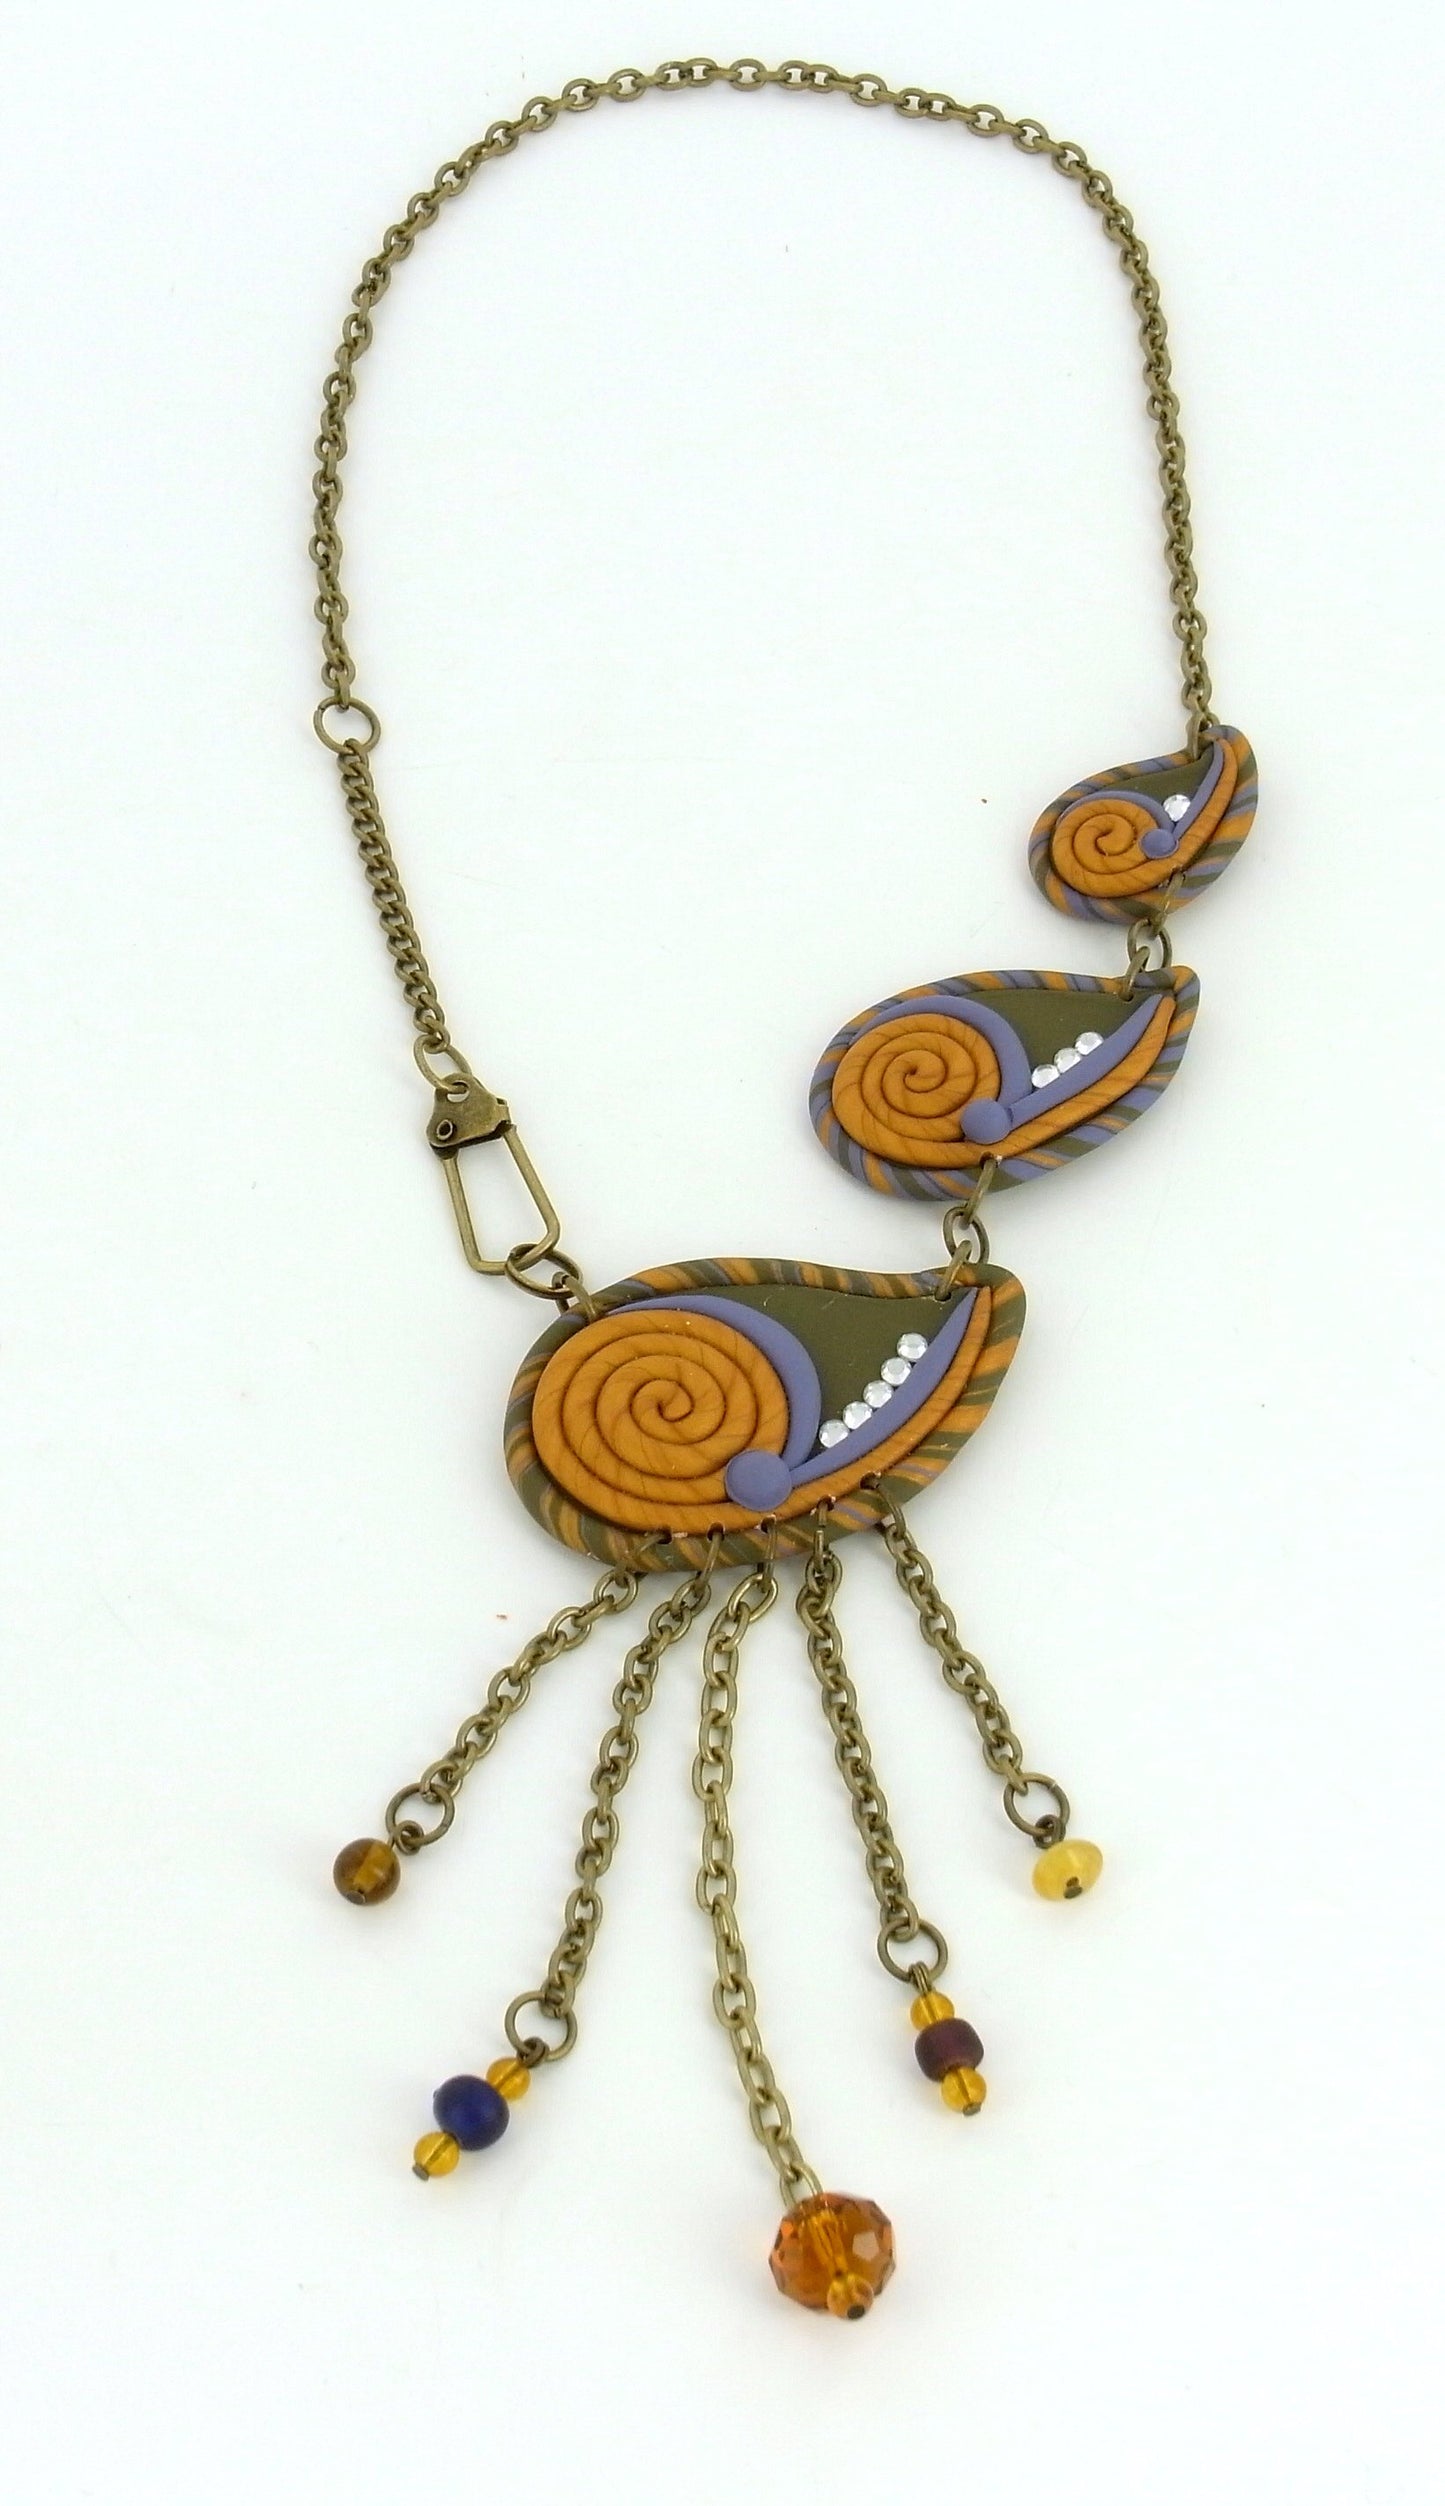
Sculpey® III Tear Drop Cutter Paisley Necklace
Sculpey® III Tear Drop Cutter Paisley Necklace
Read More
The tear drop graduated cutter set adds a new dimension to jewelry making!
Read Less
ADDITIONAL SUPPLIES
• HotFix clear crystals or other rhinestones/crystals (9)
• 24" antique gold chain and clasp
• (20) 10mm antique gold jump rings
• (5) antique gold head pins
• Jewelry pliers
• (5) coordinating glass beads|• HotFix clear crystals or other rhinestones/crystals (9)
• 24" antique gold chain and clasp
• (20) 10mm antique gold jump rings
• (5) antique gold head pins
• Jewelry pliers
• (5) coordinating glass beads
Project Instructions
Your Workspace:
Please make sure your work area is covered and you are not working on an unprotected surface. We recommend working on the Sculpey® Work ‘n Bake Clay Mat, wax paper, metal baking sheet, or disposable foil. Uncured clay may damage unprotected furniture or finished surfaces. Be sure to cover your crafting area appropriately.
Getting Started:
Start with clean hands, unwrap and knead clay until soft and smooth, or condition by running clay though a Pasta Machine. We recommend using a designated machine for clay purposes only. When working with multiple colors, clean hands with soap and water or baby wipes (we have found that baby wipes work best) before switching colors. Shape clay, pressing pieces firmly together. Wash hands after use.
Baking:
Begin by preheating oven to 275 °F (130 °C). After you are done creating; for best results bake clay on an oven-proof surface such metal, aluminum foil, an index card or the Sculpey® Clay Mat at 275°F (130 °C) for 15 minutes per ¼" (6 mm) thickness according to package directions. Oven safe glass or ceramic surfaces are also acceptable for baking; however please note that the baking times may take longer as the glass or ceramic surfaces take longer to heat up. For best baking results, use an oven thermometer. DO NOT USE MICROWAVE OVEN. DO NOT EXCEED THE ABOVE TEMPERATURE OR RECOMMENDED BAKING TIME.
Make 1.5" X .25" logs from each of the clay colors. Stack them up as shown.Roll and twist the colors together to form a log. Roll and twist the colors until the log is about 4" long. Fold the log in half and then in half again. Roll and twist the colors until the log is very thin, about 1/8" thick. Set aside.


Make a sheet of Camouflage using the clay conditioning machine on a #1 thickness. Cut out a 2", a 1.5" and a 1" teardrop. Bend the tip of each teardrop so that it curves and looks like a paisley.

Wrap the outside of each paisley in the striped rope. Trim the ends and smooth the seam with your finger.

Roll Gold into a very long thin rope about 1/8" thick. Cut off about 4" and taper each end. Roll one end up into a coil. Continue rolling the coiled end up until it fits nicely in the large end of the paisley. Place the gold coil on top of the paisley with the extra tail following along the bottom edge of the paisley to the tip

Add thin ropes of Gentle Plum as shown. Add a large pearl of Gentle Plum using the large Etch n Pearl tool as shown.

Add five rhinestones as shown in the finished sample. Please refer to notes below about using rhinestones/crystals. Using the needle tool, create 7 holes inside the striped rope for hanging - 1 at the top, tapered end of the paisley, 1 at the top, wider end of the paisley, and 5 evenly spaced on the bottom under the gold coil. Again, refer to the finished sample for placing.
A note about rhinestones/crystals:
If your rhinestones are glass or crystal, you will be able to bake them into place on your piece. Just press them into the clay and make sure the clay comes up around them just a little to hold them into place. If your rhinestones are plastic you will not be able to bake them. Push them into place where you want them to make a well. Then gently lift them back out. Glue them into place later after the clay has been baked. OR- you can simply glue them onto the surface of the clay after baking. Another option is HotFix rhinestones. These have an adhesive on the back that will fuse with the clay while baking. These are safe to put into place on raw clay and will be securely fixed during the baking process.
Repeat all steps to decorate the medium and small paisleys. For the medium just add three rhinestones. For the small just add one rhinestone. Using the needle tool, create 2 holes inside the striped rope for hanging on both - 1 at the top, tapered end of the paisley, 1 at the bottom, wider end of the paisley.
Bake as directed above in Step 1 and allow to cool completely.
Add a jump ring to each of the holes poked into the clay pieces. Use jump rings to attach the three paisley pieces together.
Use another jump ring to attach the clasp to the large paisley as shown. Cut off 16" of chain. Use a jump ring to attach the clasp to the chain. Attach the other end of the chain to the jump ring at the tip of the small paisley.
Cut remaining chain to one 2.5" piece; two 1.75" pieces; and two 1" pieces. Attach the short chains to the jump rings on the bottom of the large paisley with the longest piece in the middle and shorter pieces going towards the outsides.
Put glass beads on head pins. Trim the head pins so that only 1/2" of the pin remains sticking out from the glass beads. Using pliers, roll the remaining 1/2" of the head pin down to form a loop just above the glass bead. Attach the glass beads to a jump ring and attach to each of the short chains.
Your Workspace:
Please make sure your work area is covered and you are not working on an unprotected surface. We recommend working on the Sculpey® Work ‘n Bake Clay Mat, wax paper, metal baking sheet, or disposable foil. Uncured clay may damage unprotected furniture or finished surfaces. Be sure to cover your crafting area appropriately.
Getting Started:
Start with clean hands, unwrap and knead clay until soft and smooth, or condition by running clay though a Pasta Machine. We recommend using a designated machine for clay purposes only. When working with multiple colors, clean hands with soap and water or baby wipes (we have found that baby wipes work best) before switching colors. Shape clay, pressing pieces firmly together. Wash hands after use.
Baking:
Begin by preheating oven to 275 °F (130 °C). After you are done creating; for best results bake clay on an oven-proof surface such metal, aluminum foil, an index card or the Sculpey® Clay Mat at 275°F (130 °C) for 15 minutes per ¼" (6 mm) thickness according to package directions. Oven safe glass or ceramic surfaces are also acceptable for baking; however please note that the baking times may take longer as the glass or ceramic surfaces take longer to heat up. For best baking results, use an oven thermometer. DO NOT USE MICROWAVE OVEN. DO NOT EXCEED THE ABOVE TEMPERATURE OR RECOMMENDED BAKING TIME.
Please make sure your work area is covered and you are not working on an unprotected surface. We recommend working on the Sculpey® Work ‘n Bake Clay Mat, wax paper, metal baking sheet, or disposable foil. Uncured clay may damage unprotected furniture or finished surfaces. Be sure to cover your crafting area appropriately.
Getting Started:
Start with clean hands, unwrap and knead clay until soft and smooth, or condition by running clay though a Pasta Machine. We recommend using a designated machine for clay purposes only. When working with multiple colors, clean hands with soap and water or baby wipes (we have found that baby wipes work best) before switching colors. Shape clay, pressing pieces firmly together. Wash hands after use.
Baking:
Begin by preheating oven to 275 °F (130 °C). After you are done creating; for best results bake clay on an oven-proof surface such metal, aluminum foil, an index card or the Sculpey® Clay Mat at 275°F (130 °C) for 15 minutes per ¼" (6 mm) thickness according to package directions. Oven safe glass or ceramic surfaces are also acceptable for baking; however please note that the baking times may take longer as the glass or ceramic surfaces take longer to heat up. For best baking results, use an oven thermometer. DO NOT USE MICROWAVE OVEN. DO NOT EXCEED THE ABOVE TEMPERATURE OR RECOMMENDED BAKING TIME.
Make 1.5" X .25" logs from each of the clay colors. Stack them up as shown.Roll and twist the colors together to form a log. Roll and twist the colors until the log is about 4" long. Fold the log in half and then in half again. Roll and twist the colors until the log is very thin, about 1/8" thick. Set aside.
Make a sheet of Camouflage using the clay conditioning machine on a #1 thickness. Cut out a 2", a 1.5" and a 1" teardrop. Bend the tip of each teardrop so that it curves and looks like a paisley.
Wrap the outside of each paisley in the striped rope. Trim the ends and smooth the seam with your finger.
Roll Gold into a very long thin rope about 1/8" thick. Cut off about 4" and taper each end. Roll one end up into a coil. Continue rolling the coiled end up until it fits nicely in the large end of the paisley. Place the gold coil on top of the paisley with the extra tail following along the bottom edge of the paisley to the tip
Add thin ropes of Gentle Plum as shown. Add a large pearl of Gentle Plum using the large Etch n Pearl tool as shown.
Add five rhinestones as shown in the finished sample. Please refer to notes below about using rhinestones/crystals. Using the needle tool, create 7 holes inside the striped rope for hanging - 1 at the top, tapered end of the paisley, 1 at the top, wider end of the paisley, and 5 evenly spaced on the bottom under the gold coil. Again, refer to the finished sample for placing.
A note about rhinestones/crystals:
If your rhinestones are glass or crystal, you will be able to bake them into place on your piece. Just press them into the clay and make sure the clay comes up around them just a little to hold them into place. If your rhinestones are plastic you will not be able to bake them. Push them into place where you want them to make a well. Then gently lift them back out. Glue them into place later after the clay has been baked. OR- you can simply glue them onto the surface of the clay after baking. Another option is HotFix rhinestones. These have an adhesive on the back that will fuse with the clay while baking. These are safe to put into place on raw clay and will be securely fixed during the baking process.
A note about rhinestones/crystals:
If your rhinestones are glass or crystal, you will be able to bake them into place on your piece. Just press them into the clay and make sure the clay comes up around them just a little to hold them into place. If your rhinestones are plastic you will not be able to bake them. Push them into place where you want them to make a well. Then gently lift them back out. Glue them into place later after the clay has been baked. OR- you can simply glue them onto the surface of the clay after baking. Another option is HotFix rhinestones. These have an adhesive on the back that will fuse with the clay while baking. These are safe to put into place on raw clay and will be securely fixed during the baking process.
Repeat all steps to decorate the medium and small paisleys. For the medium just add three rhinestones. For the small just add one rhinestone. Using the needle tool, create 2 holes inside the striped rope for hanging on both - 1 at the top, tapered end of the paisley, 1 at the bottom, wider end of the paisley.
Bake as directed above in Step 1 and allow to cool completely.
Add a jump ring to each of the holes poked into the clay pieces. Use jump rings to attach the three paisley pieces together.
Use another jump ring to attach the clasp to the large paisley as shown. Cut off 16" of chain. Use a jump ring to attach the clasp to the chain. Attach the other end of the chain to the jump ring at the tip of the small paisley.
Cut remaining chain to one 2.5" piece; two 1.75" pieces; and two 1" pieces. Attach the short chains to the jump rings on the bottom of the large paisley with the longest piece in the middle and shorter pieces going towards the outsides.
Put glass beads on head pins. Trim the head pins so that only 1/2" of the pin remains sticking out from the glass beads. Using pliers, roll the remaining 1/2" of the head pin down to form a loop just above the glass bead. Attach the glass beads to a jump ring and attach to each of the short chains.