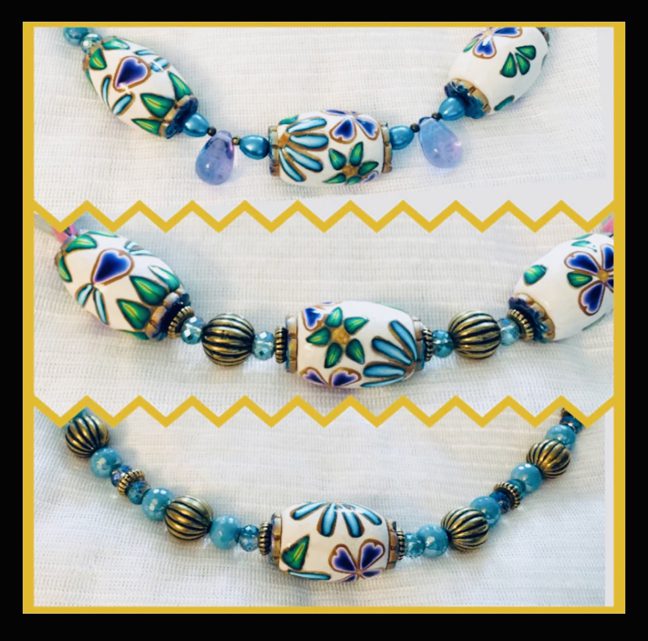
I’ll never learn everything there is to know about working with polymer clay. That’s what I love about it! One of the things I’m still exploring is clay texture. Premo is generally firm, Souffle is dry to the touch and less firm; but maintains shape well, Sculpey III and Bakeshop are soft. All four have dozens of applications.
These beads were made by placing simple cane slices on wooden beads with Translucent Liquid Sculpey. Once the slices are baked on, you can use softer clay to fill them in. I’ve also tried it with bracelets and bowls with great results.

You will need:
- Wooden beads
- Simple canes
- Sculpey III or Bakeshop for the background
- Translucent Liquid Sculpey
- Sculpey Clay Softener & Thinner
- Sculpey Super Slicer
- Sculpey Gloss Glaze
- Craft knife, metal chopstick, cotton swabs, sandpaper
Instructions:

Place your wooden bead firmly on the chopstick. Apply cane slices (about the thickness of a dime) to your wooden beads using TLS. I made little scrap piers for baking. Bake for 15 minutes.

Once cooled, brush TLS into the voids and add the background color between the cane slices. Make sure it’s completely filled in. Use a cotton swab to clean off the excess clay with Sculpey Clay Softener & Thinner. Bake again for 30 minutes.

Pare down any high spots with craft knife. Sand smooth. Apply several coats of Sculpey Gloss Glaze for a porcelain look. You’ll learn so much just by practicing this. I know I did! And that will lead new skills for your ever-growing toolbox.


 You will need:
 Place your wooden bead firmly on the chopstick. Apply cane slices (about the thickness of a dime) to your wooden beads using TLS. I made little scrap piers for baking. Bake for 15 minutes.
  Once cooled, brush TLS into the voids and add the background color between the cane slices. Make sure it’s completely filled in. Use a cotton swab to clean off the excess clay with Sculpey Clay Softener & Thinner. Bake again for 30 minutes.
  Pare down any high spots with craft knife. Sand smooth. Apply several coats of Sculpey Gloss Glaze for a porcelain look. You’ll learn so much just by practicing this. I know I did! And that will lead new skills for your ever-growing toolbox.


