

premo Sculpey Accents Fingertip Bowls
premo Sculpey Accents Fingertip Bowls
Read More
These little stash bowls are great for wrapped candies, ring caddies and battery-powered tea lights.
Design by Amy Koranek
NOTE: I used Big Daddio Hemisphere baking bowls as the form for my four graduated bowl sizes. You can also use old light bulbs to form the shape of your bowls.
Read Less
CLAYS:
premo! Sculpey® Accents 2oz. Bright Green Pearl - 1 Block
premo! Sculpey® Accents 2oz. Peacock Pearl - 1 Block
premo! Sculpey® Accents 2oz. Sunset Pearl - 1 Block
premo! Sculpey® Accents 2oz. Purple Pearl - 1 Block
ADDITIONAL SUPPLIES
Big Daddio Hemisphere Baking Bowls in graduated sizes, or a used lightbulb

Project Instructions
Getting Started:Polymer clay may stain. CLAY MAY DAMAGE UNPROTECTED FURNITURE OR FINISHED SURFACES. DO NOT USE polymer clay on unprotected surfaces. We recommend working on the Sculpey® Work ‘n Bake Clay Mat, wax paper, metal baking sheet, or disposable foil. Start with clean hands and work surface area. Knead clay until soft and smooth. For best results, clean your hands in between colors. Shape clay, pressing pieces together firmly. Bake on oven-proof glass or metal surface at 275°F (130 °C) for 30 minutes per ¼" (6 mm) thickness. For best baking results, use an oven thermometer. DO NOT USE MICROWAVE OVEN. DO NOT EXCEED THE ABOVE TEMPERATURE OR RECOMMENDED BAKING TIME. Wash hands after use. Baking should be completed by an adult. Begin by preheating oven to 275 °F (130 °C). Test temperature with oven thermometer for perfectly cured clay. For best results, condition all clay by running it through the Clay Conditioning Machine for several passes on the widest setting. Fold the clay in half after each pass and insert the fold side into the rollers first.
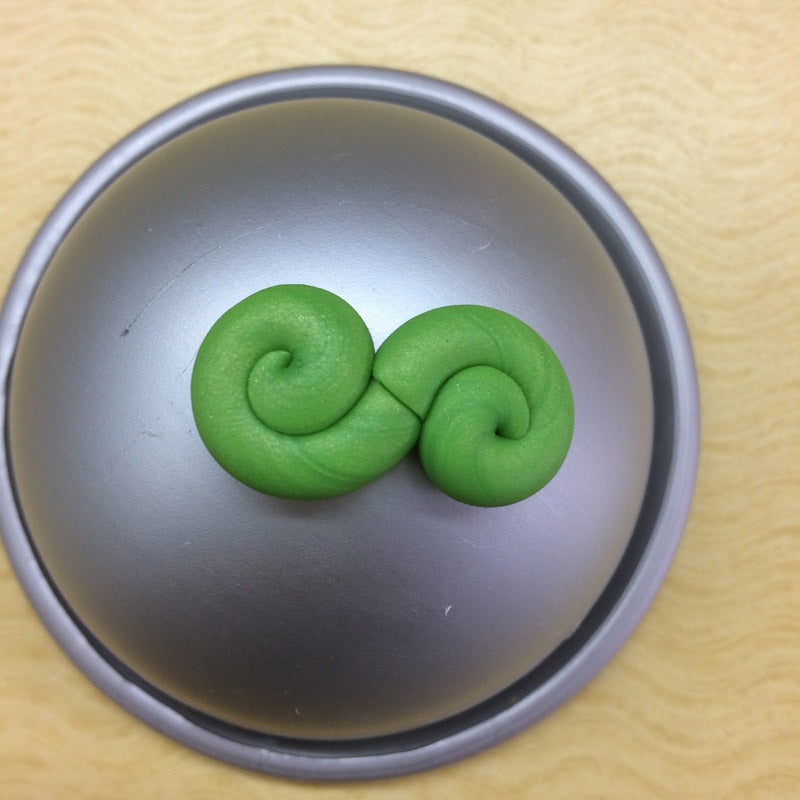
Roll a rope of Bright Green Pearl about 1/4” thick. As you roll the rope, twist it so that the mica in the clay makes a candy stripe. Cut an angled point on one end or roll to a taper.

Starting with the taper or pointed end coil the clay up into a curlicue.

Make a total of seven curly-q’s. Position the first two as shown on the bowl or bulb.
Continue positioning the curly-q’s around the first one as shown.
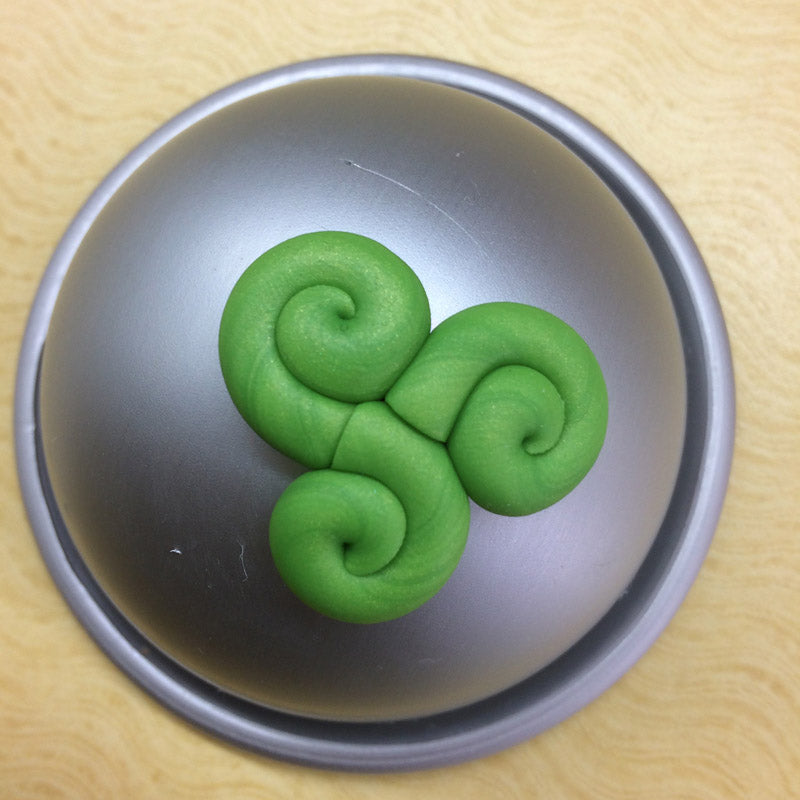
Position each curl as shown with one in the middle and six around the outside. Make sure all the sides are touching. Smash them gently into place so that they really grab onto each other.

For two of the bowls - the green and the purple - I finished them with a tear drop shape

Snuggle a teardrop into the joint of each curly-q

For the Peacock Pearl and the and the Sunset Pearl bowls, I finished these with a twisted rope of clay all the way around the outside.

At the bottom of each bowl, form a circle with a twisted rope of coordinating color for a foot.

If you’d like to make a set of bowls, repeat these instructions, but for each larger bowl, make the curly-q’s larger with more coils and use a larger bulb or metal bowl for a form. Bake all bowls on the form following the manufacturer’s instructions above.
