
Have you tried the New Super Sculpey Skin Tone Mixing Kit yet?
I recently had the chance to work with this new kit and was amazed by how many different skin tones could be mixed with so few colours!
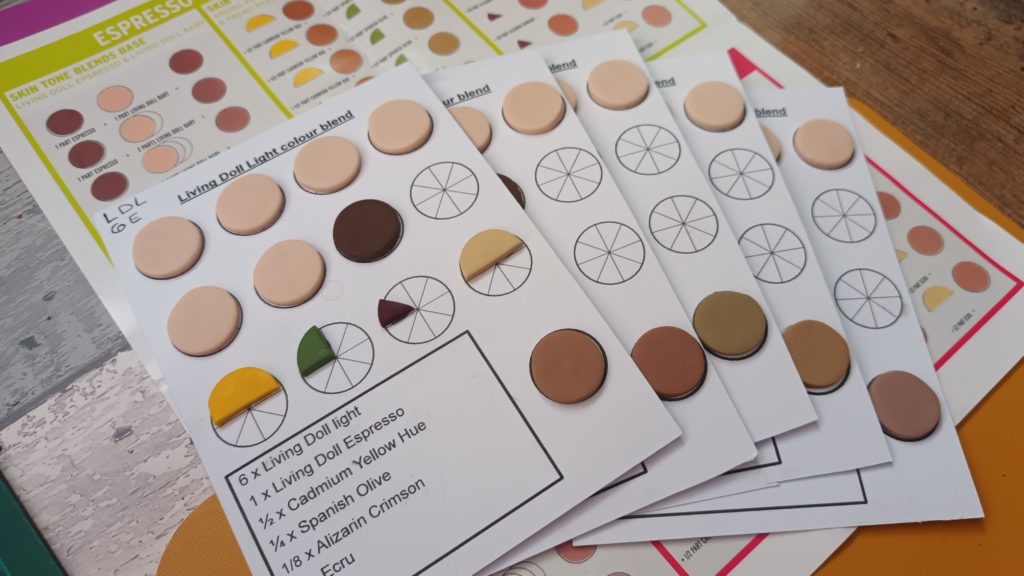
Using the recipe chart that comes with the kit, I was able to mix 30 different shades for each of the Living Doll base colours (Light, Beige, and Baby). That’s 90 different skin tones. Wow!
And that’s just the start. If you want even more shades, you can add some white Premo into your final mix and get even more tonal variations.
The kit includes the following:
- 2 oz. blocks of each of the Super Sculpey Living Doll colours in Espresso, Light, Beige and Baby.
- 1 oz. each of Sculpey Premo in Cadmium Yellow, Spanish Olive, Ecru, and Alizarin Crimson.
- A mixing chart with the colour recipes to mix a huge range of warm, cool, and olive skin tones, based on a makeup artist’s skin classifications from pales to cacao.
This kit allows you to mix multiple skin tones and gives you enough clay to work on several small projects.
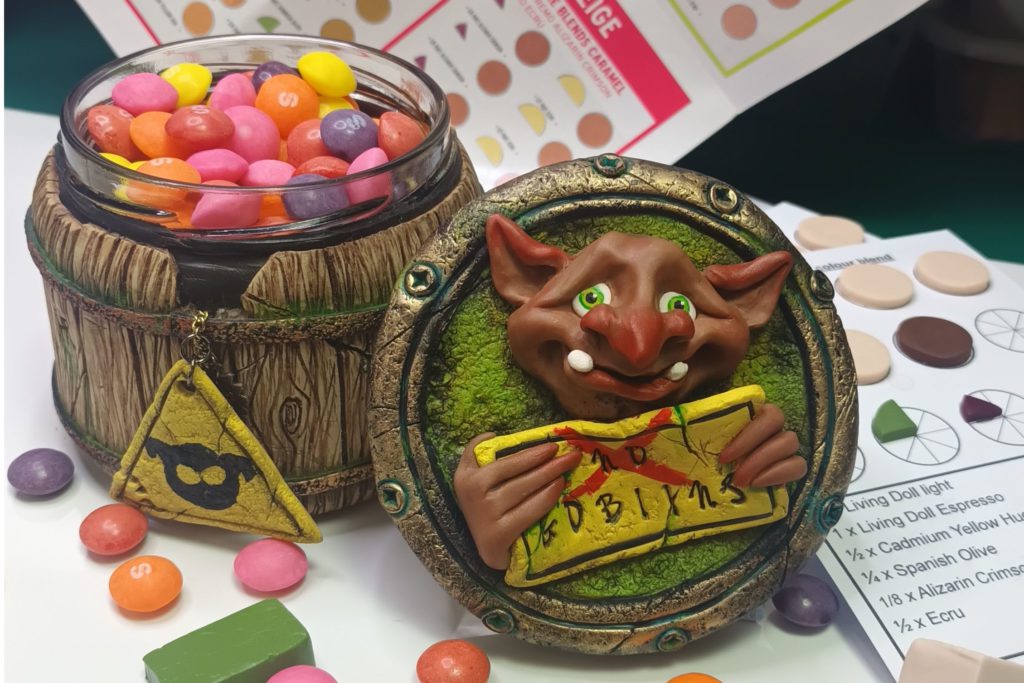
I decided to make some colour swatch cards and a small pixie goblin sweet jar, and I still had loads of clay left over.

To make my colour swatch cards I also used the following items:
- Sculpey Tools™ Clay Conditioning Machine to ensure that each colour was rolled to the same thickness.
- Sculpey Tools™ Graduated Cutters: Circle, 6 pc to accurately measure out the same amount of clay each time.
- Sculpey Tools™ Clay Blades to cut and measure my clay into portions.
- A clean work surface.
- Some White Premo to mix some lighter shades with my chosen skin tone.
I had no idea what to expect from this kit, other that it would teach me how to mix a variety of skin tones, but I was really impressed. I learned so much after mixing only a few shades, and I was able to mix exactly the same multiple times over, so there were no worries about mixing too much or not enough of the shade that I needed.
And when I added white clay into the mix, I was able to see even more possibilities! By adding white into the mix I was able to create some beautiful earthy tones, perfect for creating natural wood, mushroom, and stone effects.

To create my sweet jar, I mixed the skin tone I wanted for my pixie goblin, and then added some White Premo™ into the mix to create the wooden barrel effect for my jar.
After baking, I brushed on some watered-down acrylic paint, adding some shadows and blush to my piece, which helped add extra tonal depth.

Creating the colour swatch cards by following the mixing chart was a fun little exercise, which taught me so much about colour mixing, and it also gave me some useful colour swatch cards to refer to later.
What would you like to create with this fun new kit?
Please share your creations and ideas with us on social media using the hashtag #HowDoYouSculpey
We can’t wait to see what you create.
Happy Claying!
Heather Robertson
